We’re celebrating our 35th anniversary here at American Quilter’s Society, and it has us looking back at the trends that have shaped the quilting world and the trends of the moment fueling the future of quilting. This month, we’re trying Mosaic Quilts.
Mosaic quilts are inspired by the art of tile mosaics. Mosaic quilts run the spectrum of techniques, intricacies, and subject matter. Here are three quilts from QuiltWeek contests that feature mosaic motifs.

Kimberly Lacy uses repeating shapes to create an abstract representation of a canyon. The rounded corners of her mosaic shapes helps evoke the wind-worn qualities of a canyon.

Hyungmi Kim uses organic rectangle shapes laid out like brick and smaller, stone shaped pieces to create a lion. The image evokes a mosaic made of tile and stones, and the smaller stone shapes help keep the eye interested and allow for finer details to be captured.

Lise Bélanger Trois-Pistoles won the Gammill Quilting Machines Best Wall Quilt at AQS QuiltWeek Fall Paducah 2018 with this quilt. Parts of the quilt use a very fine mosaic motif. In this quilt, mosaic creates a stylized, fantastical world like in a storybook.
So mosaic can be used in a variety of ways to achieve different effects. Above all, it’s easy and fun to try.
How to Try This Trend
We’ve put together a photo tutorial of a small project you can make using your smallest fabric scraps. Let’s get started!
Mosaic Magic
Supplies:
A variety of fabric scraps
Fat Quarter of background fabric
Lite Steam-A-Seam 2
Chaco Liner Pen
Ruler, Rotary Cutter, and Mat — or Scissors
Coordinating thread for top stitching/quilting
Batting, Backing, and Binding
Instructions
Mosaic Pieces Preparation
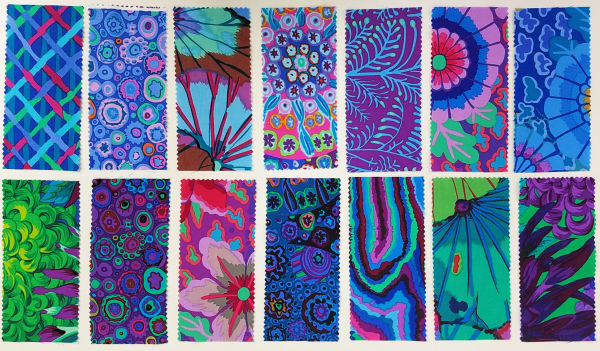
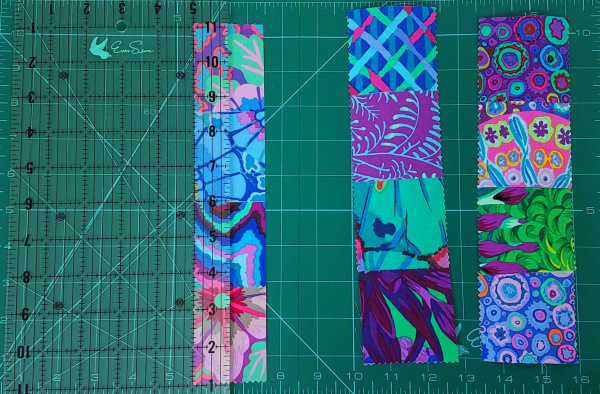
Select your fabric scraps and sort by value (lightness or darkness) and/or color. I had leftovers from a 2 1/2″ strip project.
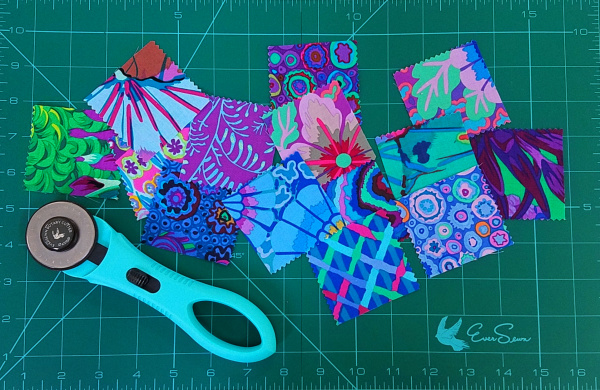
Cut the scraps into a uniform size. I cut mine into 2 1/2″ squares.

Cut strips of Lite Seam-A-Seam 2 the width of the fabric scraps. You can use a different fusible, but I like that Lite Steam-A-Seam 2 sticks to fabric before iron fusing, so you can reposition fabric throughout the process.
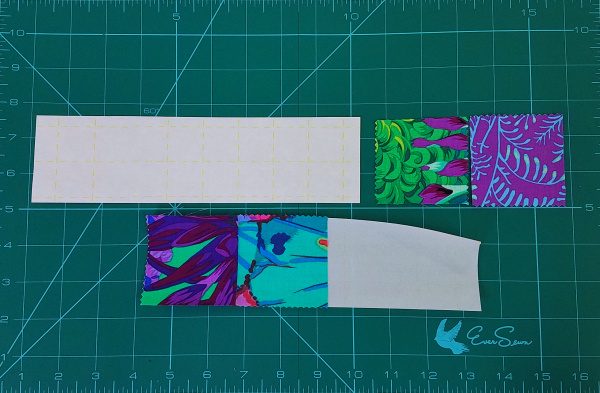
Remove the backing paper from the Steam-A-Seam strips and place the fabric scraps onto the adhesive side. Butt the pieces together, but don’t overlap. Repeat to back all the fabrics with fusible. Press to fuse following the manufacturer’s guidelines.
Trim the strips into their finished size. I trimmed to 1″ strips.
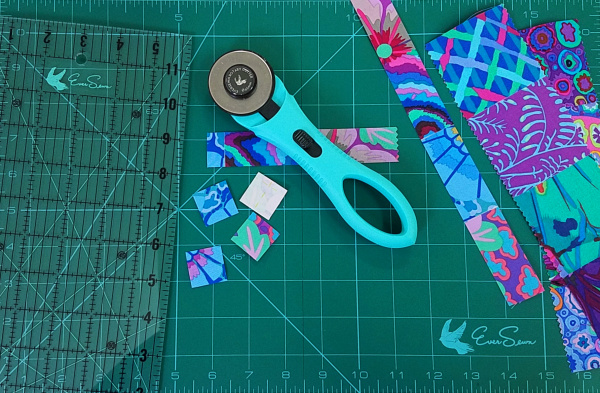
Cut the strips into squares. Avoid where the fabrics butt up to each other. Repeat for all the strips. For easy arranging later, keep the squares sorted by value or color.
Background Preparation
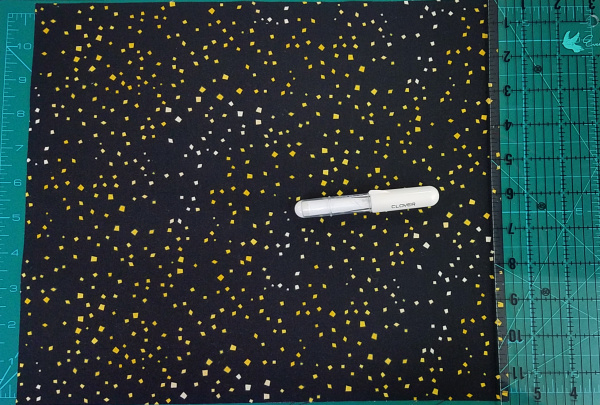
Trim the background fabric to the size you’d like to to finish, plus half an inch. I cut mine 11 1/2″ x 13 1/2″ for an 11″ x 13″ finished piece.

Use a chaco liner or other heat-safe marking tool to mark 1/4″ around the perimeter of the background fabric. This marks the outer seam line.
Finishing Touches
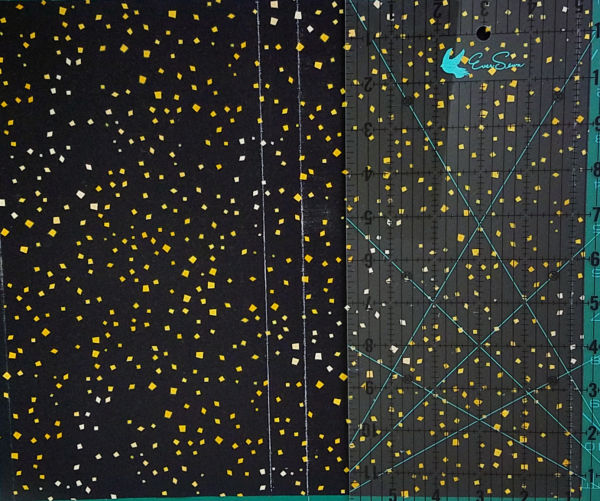
Mark out a grid starting fro the center. For a design with little to no space between the squares, mark out the grid the exact size of your cut squares. For more space in between squares, add spacer lines between grid squares the amount of room you’d like between squares.
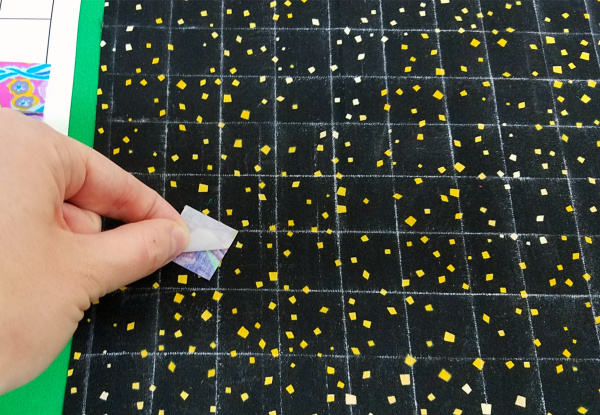
Remove the paper back from the mosaic squares once the grid is marked. Arrange on the background fabric into a design that pleases you. With Lite Steam-A-Seam 2, you can finger press the squares to the fabric and they’ll adhere enough for you to really audition the design, simply lift and reposition if you change your mind.

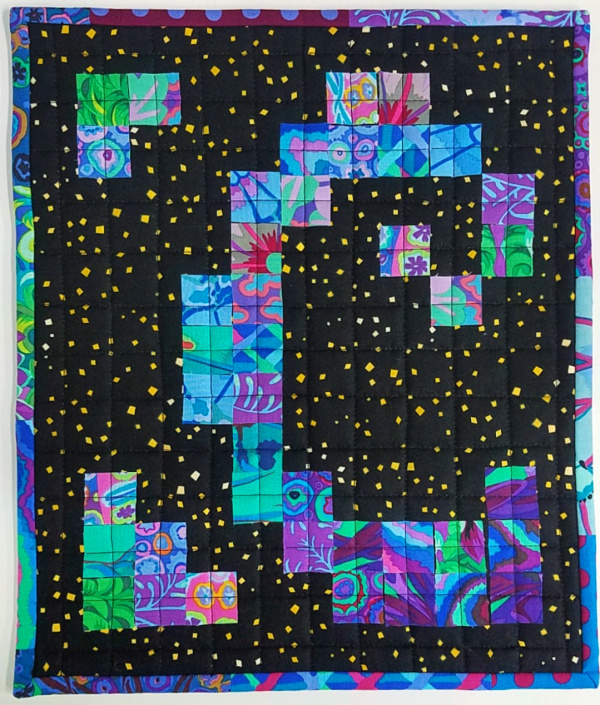
I went with an abstract swirl and decided the square creating a point in the middle of the outside of the swirl was too much at the last second. I just peeled it off before ironing!
Once you’re happy with your design, press following the fusible manufacturer’s instructions to fuse the mosaic design.
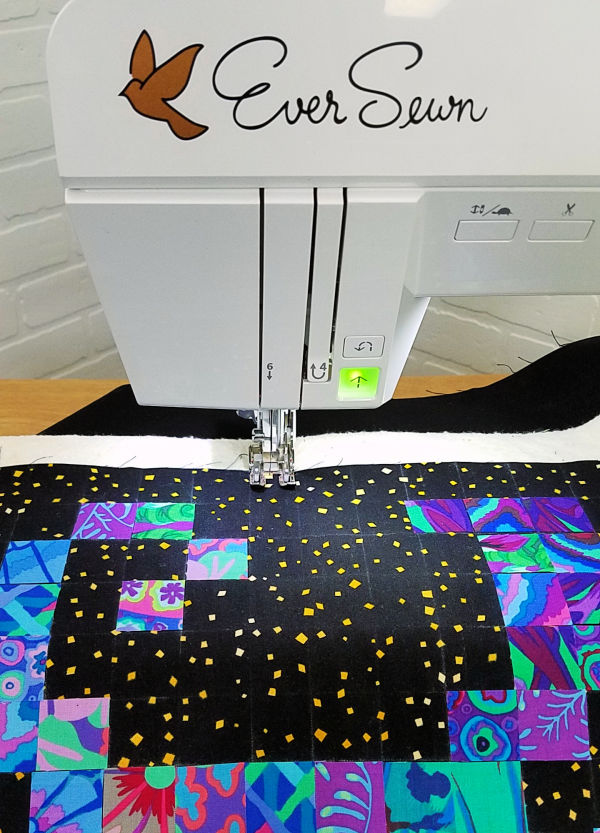
Layer with batting and backing and quilt. The fused pieces don’t have to be sewn over to secure them to the fabric, so have fun with the quilting design. I quilted a line down the center of the squares of the grid for a simple, but effective finish.
Bind and enjoy! This is a really easy way to start with mosaic, and has tons of room for variation. Experiment with different looks, shapes, and distances between the shapes.
Ready for more inspiration?
Check out our Must-Try Pinterest board full of trendy eye-candy to get inspired.
Have you tried this trend? Show us your creations in our Facebook group, AQS Quilting Project Parade. We can’t wait to see what you make!