
Journey to Paducah – Block Thirty-two
15″ x 15″ finished block size
Fabrics:
Black
Dark Turquoise
Dark Aqua
Light Orange
Light Yellow
Dark Yellow
Light Gold
Coral
Orange
Dark Orange
Center Block Cutting Instructions:
From the black fabric, cut:
(21) 1 1/2″ x 1 1/2″ squares
(8) 1″ x 1 1/2″ rectangles
(4) 1″ x 1″ squares
(4) 2 1/4″ x 2 1/4″ squares
(4) 2″ x 3 1/2″ rectangles
From the light gold fabric, cut:
(8) 1″ x 2″ rectangles
From the dark orange fabric, cut:
(8) 1 1/2″ x 1 1/2″ squares
(8) 1″ x 1″ squares
(4) 2 1/4″ x 2 1/4″ squares
From the orange fabric, cut:
(4) 1 1/2″ x 1 1/2″ squares
(8) 1 1/2″ x 2″ rectangles
(4) 1″ x 1″ squares
Block Frames Cutting Instructions:
From the black fabric, cut:
(2) 1 1/2″ x 7 1/2″ rectangles*
(2) 1 1/2″ x 9 1/2″ rectangles*
(4) 1 1/2″ x 2 1/2″ rectangles
(20) 1 1/2″ X 3 1/2″ rectangles
(40) 1 1/2″ x 1 1/2″ squares
(8) 2 1/2″ x 2″ rectangles (used for paper piecing, cut to your preference.)
From the dark turquoise fabric, cut:
(2) 2 1/2″ x 2 1/2″ squares (used for paper piecing, cut to your preference.)
(4) 1 1/2″ x 1 1/2″ squares
From the dark aqua fabric, cut:
(1) 2 1/2″ x 2 1/2″ squares (used for paper piecing, cut to your preference.)
(2) 1 1/2″ x 1 1/2″ squares
From the dark sky fabric, cut:
(1) 2 1/2″ x 2 1/2″ squares (used for paper piecing, cut to your preference.)
(2) 1 1/2″ x 1 1/2″ squares
From the dark yellow fabric, cut:
(2) 1 1/2″ x 1 1/2″ squares
From the coral fabric, cut:
(2) 1 1/2″ x 1 1/2″ squares
From the light yellow fabric, cut:
(4) 1 1/2″ x 1 1/2″ squares
From the light orange fabric, cut:
(4) 1 1/2″ x 1 1/2″ squares
Center Block Instructions:
Quarter Square Triangles
Mark the backs of the dark orange 2 1/4″ squares from corner to corner.
Layer with the black 2 1/4″ squares, right sides together.
Sew a 1/4″ on both sides of the marked line. Cut apart on the marked line. Press seams toward the black.
Mark the backs of two of the half square triangles from corner to corner crossing the seam.
Layer two half square triangles right sides together with opposite colors together.
Sew a 1/4″ on both sides of the marked line. Cut apart on the marked line.
Make 4.

Unit measures 1 1/2″ square.
Using the black 1 1/2″ squares, layout the center star in rows. Sew the rows together as shown below.


Half Square Triangle Units
Mark the backs of the dark orange 1 1/2″ squares from corner to corner.
Layer with the black 1 1/2″ squares, right sides together.
Sew a 1/4″ on both sides of the marked line. Cut apart on the marked line.
Trim to 1″ square.
Make 16 dark yellow/black.
Flying Geese Units
Mark the backs of the dark orange 1″ squares from corner to corner.
Lay in the corner of a black 1″ x 1 1/2″ rectangle right sides together.
Sew on the marked line. Trim off the corner. Press the remaining part of the orange square up to complete the corner.
Repeat with another orange 1 1/2″ marked square for the other corner.
Unit measures 1″ x 1 1/2″ rectangle.
Make 4.
Using the Half Square Triangle units and the Flying Geese Units create four rows as shown below.

Star Point Units
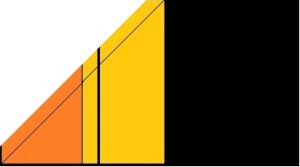
Sew a light gold 1″ x 2″ rectangle to an orange 1 1/2″ x 2″ rectangle.
Unit measures 2″ squares. Make 8.
Mark the back from corner to corner, four from top left to bottom right and the other four top right to bottom left as shown below. (The extra line on the yellow is showing the seam allowances pressed toward the orange.)
Lay a marked two-colored square in the corner of a black 2″ x 3 1/2″ rectangle, right sides together. The marked line should point to the center of the black rectangle as shown below.

Sew on the line. Trim the corner a 1/4″ and press open to complete the corner. Repeat for the other side.

Repeat for the other side.
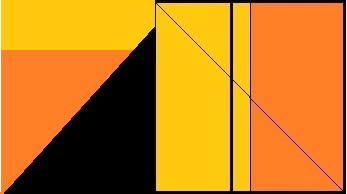
Unit measures 2″ x 3 1/2″. Make 4.

Corner Units
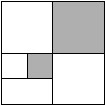
Sew an orange 1″ square to a black 1″ square. Using the images below as a guide for orientation, sew a black 1″ x 1 1/2″ rectangle to the bottom. Make two for both directions.
Using two black and one orange 1 1/2″ square, sew the corner unit together.

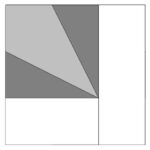
Center Assembly
Using the units constructed above, lay out the block into sections as shown below. Sew the sections together. Sew the sections into a block center.
Center unit measures 7 1/2″ square. If the block center is smaller than 7 1/2″ square, see the note in the sizing frame instructions.


Block Frame Instructions:
Sizing Frame
*This frame can be cut a little larger, sewn on, then used for trimming the block center to 9 1/2″ square.
Sew the 1 1/2″ x 7 1/2″ black rectangles to both sides of the block center.
Sew the 1 1/2″ x 9 1/2″ black rectangles to the top and bottom of the block center.
Star Point Corners
Download and print four corner unit paper piecing patterns.
Using the 2 1/2″ x 2″ black rectangles and 2 1/2″ x 2 1/2″ dark sky, dark aqua, and dark turquoise set aside for paper piecing, make 4 corner units.
Need help paper piecing. Watch this tutorial.
Sew a 1 1/2″ x 2 1/2″ black rectangle to one side of the corner unit as shown below. Make 2 of each orientation shown below.

Sew the black 1 1/2″ X 3 1/2″ rectangles to the other side of the corner unit. Repeat for all four corners.
Side Frame Unit
Sew a black 1 1/2″ square to each side of the 1 1/2″ colored squares.
Make 4 light yellow units.
Make 4 light orange units.
Make 2 dark aqua units.
Make 2 dark sky units.
Make 4 dark turquoise units.
Make 2 dark yellow units.
Make 2 coral units.
Sew a 1 1/2″ x 3 1/2″ black rectangle between the previous units to make up the sides of the frame. Use the color guide below for placement.

Sew the sides of the frame to the block. Sew the corner units to the top and bottom rows of the frame. Sew to the block.
Trim block to 15 1/2″ x 15 1/2″.

Color Key available here. Come back tomorrow for Block 33.
Journey to Paducah and visit Kits by Carla at AQS QuiltWeek – Paducah!

Join us and quilt along, share your progress, and learn from other quilters at the AQS Project Parade Facebook group!
 eBook 100 Sweet Treats by & for Quilters