
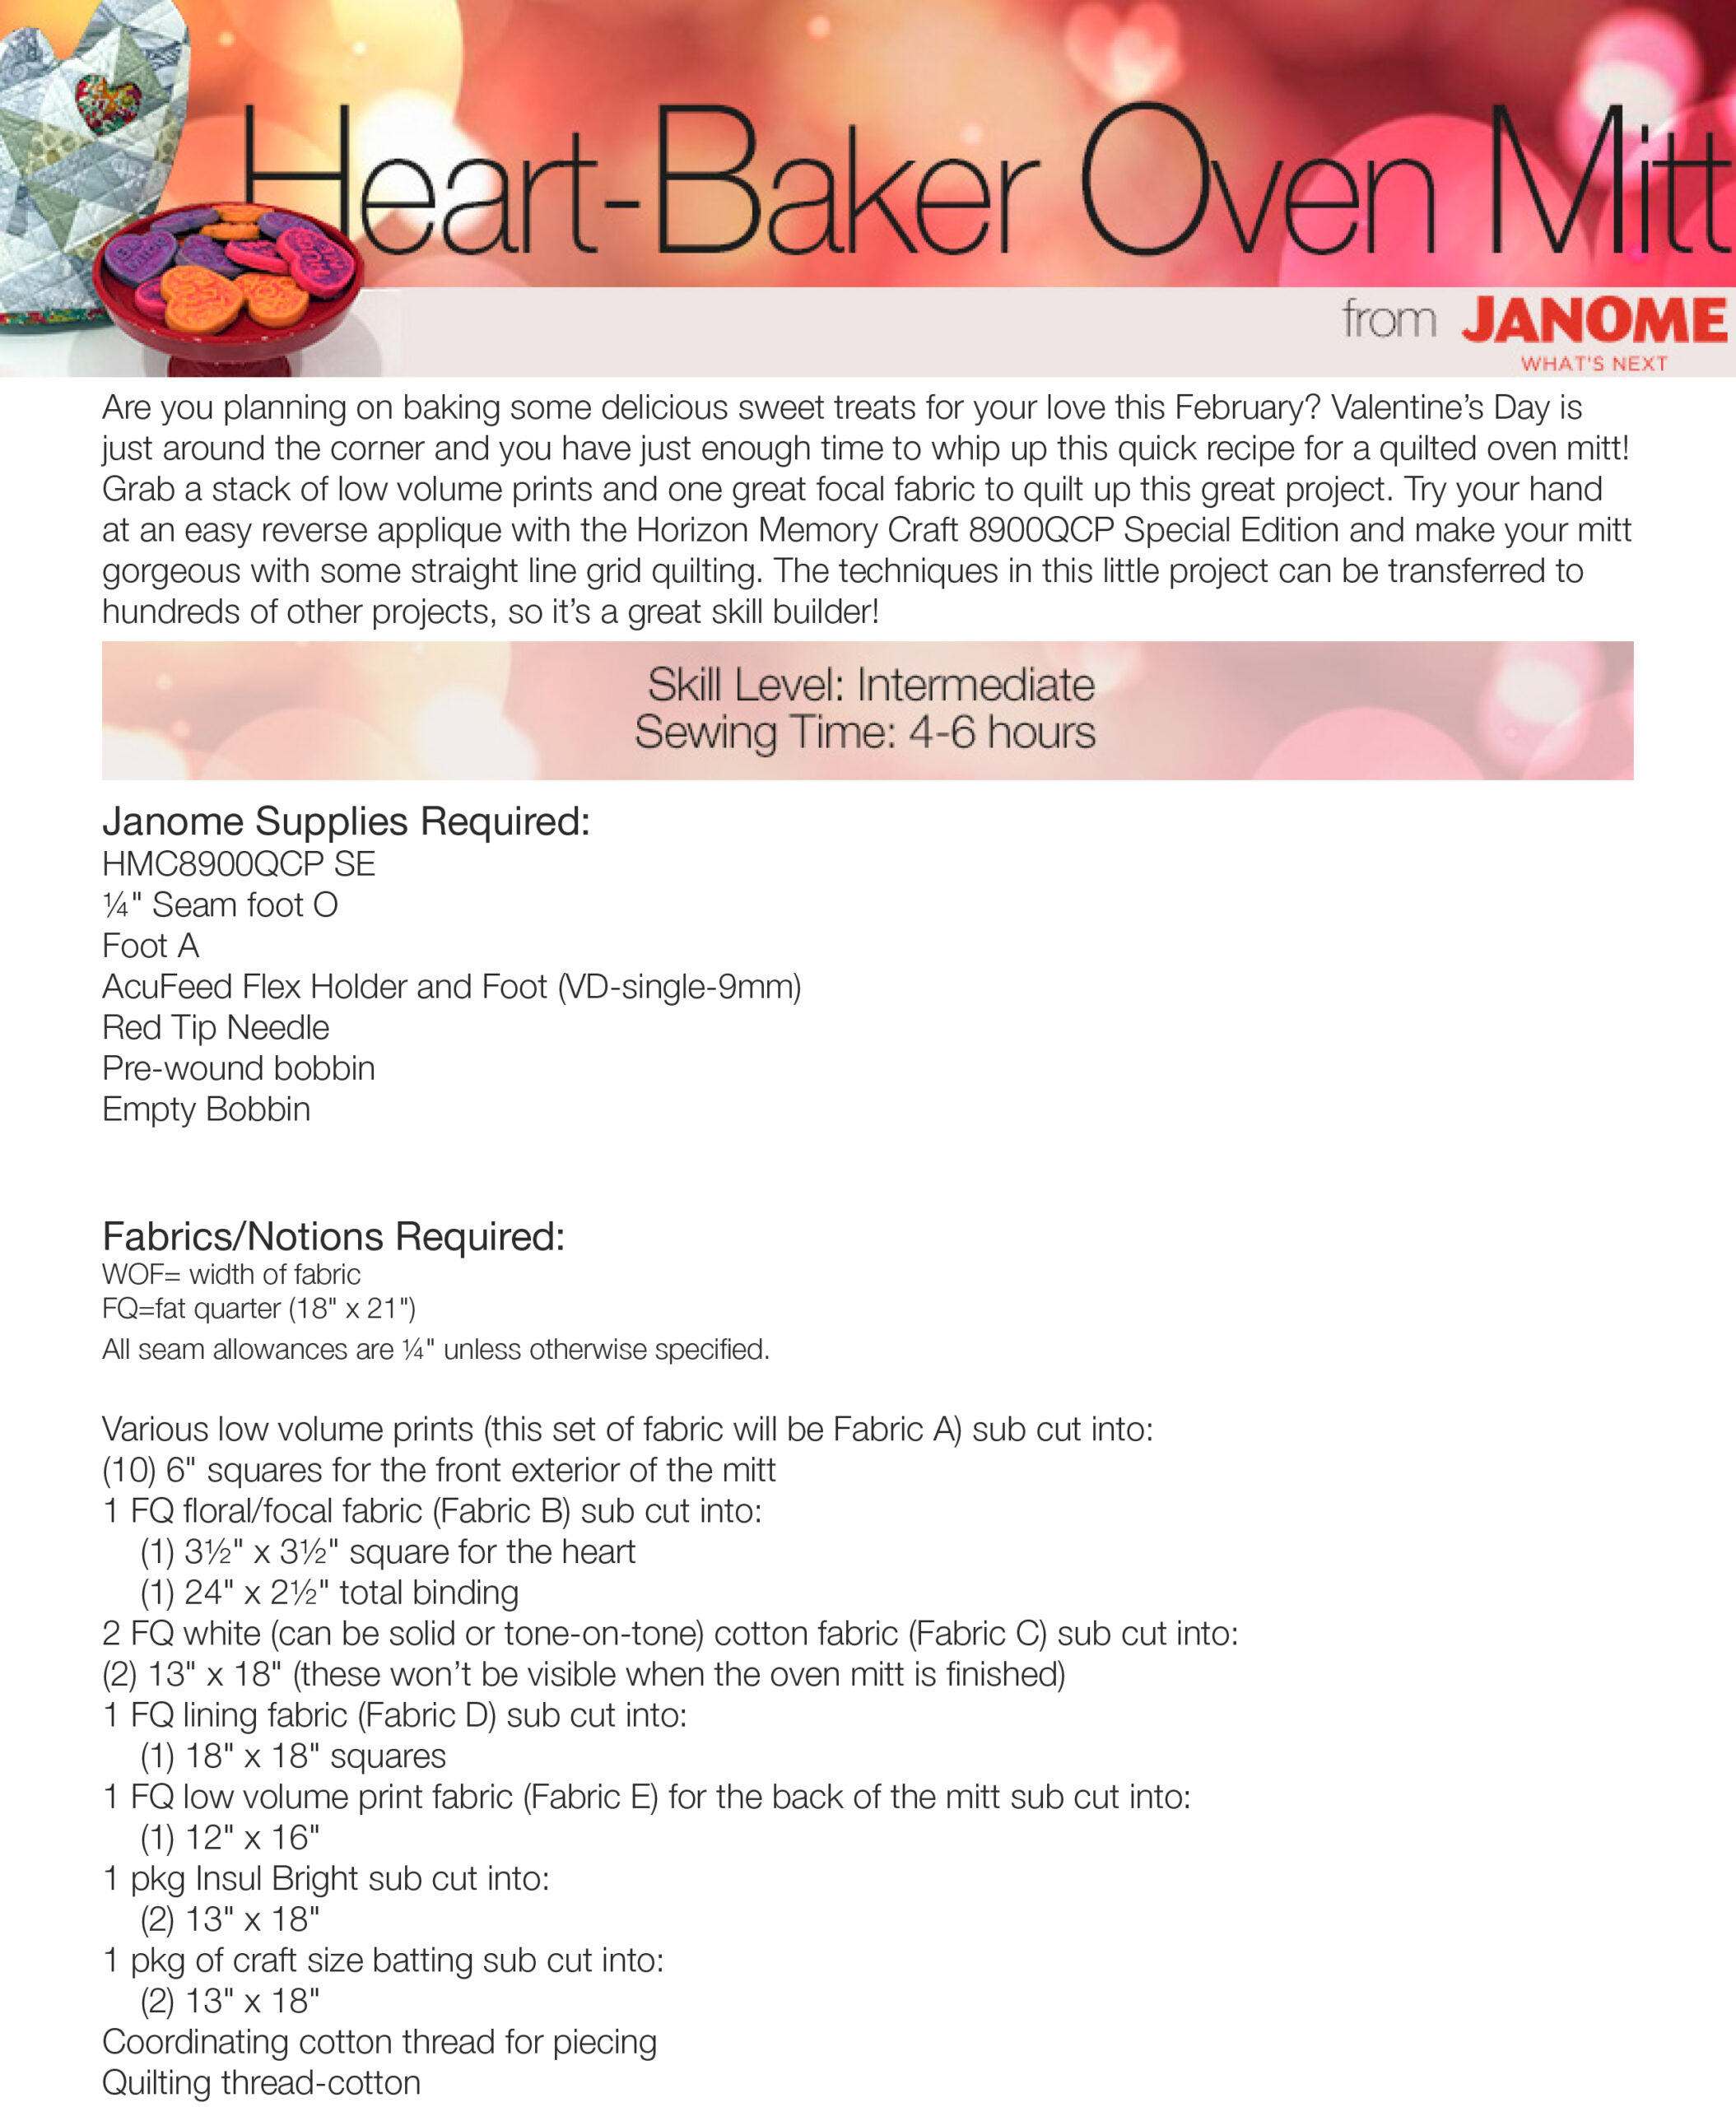
Are you planning on baking some delicious sweet treats for your love this February? Valentine’s Day is just around the corner and you have just enough time to whip up this quick recipe for a quilted oven mitt! Grab a stack of low volume prints and one great focal fabric to quilt up this great project. Try your hand at an easy reverse applique with the Horizon Memory Craft 8900QCP Special Edition and make your mitt gorgeous with some straight line grid quilting. The techniques in this little project can be transferred to hundreds of other projects, so it’s a great skill builder!

Janome Supplies Required:
HMC8900QCP SE
¼” Seam foot O
Foot A
AcuFeed Flex Holder and Foot (VD-single-9mm)
Red Tip Needle
Pre-wound bobbin
Empty Bobbin
Fabrics/Notions Required:
WOF= width of fabric
FQ=fat quarter (18″ x 21″)
All seam allowances are ¼” unless otherwise specified.
Various low volume prints (this set of fabric will be Fabric A) sub cut into:
(10) 6″ squares for the front exterior of the mitt
1 FQ floral/focal fabric (Fabric B) sub cut into:
(1) 3½” x 3½” square for the heart
(1) 24″ x 2½” total binding
2 FQ white (can be solid or tone-on-tone) cotton fabric (Fabric C) sub cut into:
(2) 13″ x 18″ (these won’t be visible when the oven mitt is finished)
1 FQ lining fabric (Fabric D) sub cut into:
(1) 18″ x 18″ squares
1 FQ low volume print fabric (Fabric E) for the back of the mitt sub cut into:
(1) 12″ x 16″
1 pkg Insul Bright sub cut into:
(2) 13″ x 18″
1 pkg of craft size batting sub cut into:
(2) 13″ x 18″
Coordinating cotton thread for piecing
Quilting thread-cotton
Student Supplies Required:
Oven mitt template provided, printed at 100%
Frixion pen
Rotary cutter/ruler/mat
Safety Pins/basting pins
Elmer’s School Glue
Glue basting tip (optional)
Piecing front exterior of the oven mitt
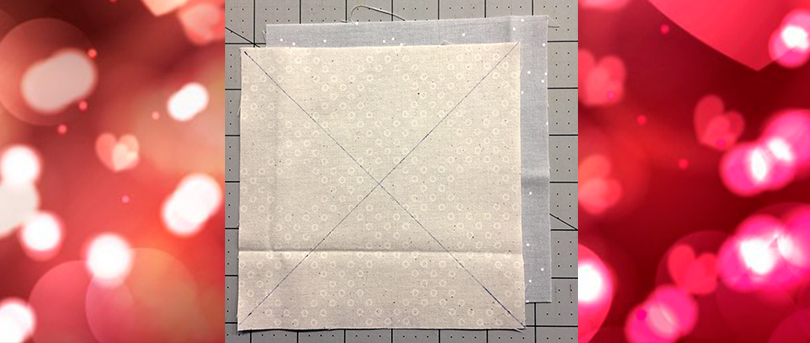
1. On half of the (10) 6″ squares of low volumes, use a Frixion pen to mark the wrong side of the fabric, making an “X” by marking from corner to corner and repeating on the opposite corner to corner. Pair each of the squares you just marked with an unmarked square, and place them right sides together, matching raw edges, and pin in place. You will have a total of 5 of these pinned sets.
2. Stitch a ¼” seam allowance on each side of both drawn lines.
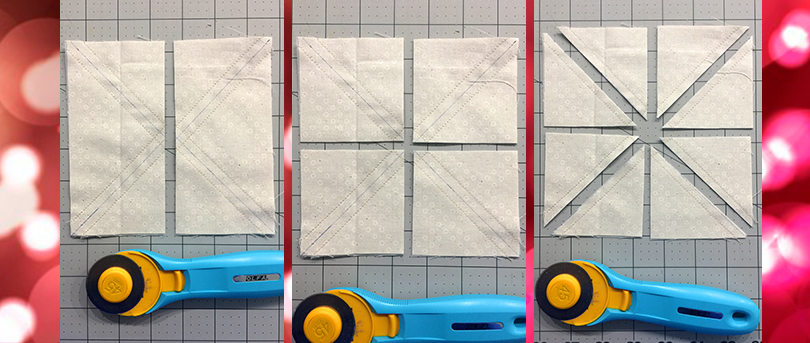
3. Use a ruler and rotary cutter to make a total of 4 cuts. Make the first cut vertically to cut the 6″ square in half. Make the second cut horizontally. And make the third and fourth cuts on the marked lines you drew in step 1.
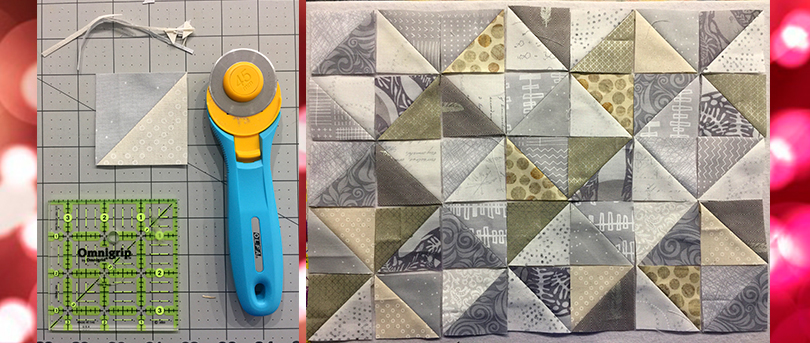
4. This will yield a total of 8 Half-square triangle (HST) units. Press seams open to reduce bulk. Use a ruler and rotary cutter to square up the HST units to measure 2½”. Repeat steps 2 and 3 with the remaining 6″ squares to get a total of 40 HST units (you’ll need 35).
5. Arrange the HST units into a 5 x 7 layout.
6. Change to the quarter inch Foot O, and select the “D95S” Setting on the MC8900.
7. Piece the rows together that contain 7 HST units with a ¼” seam allowance. Press seams.
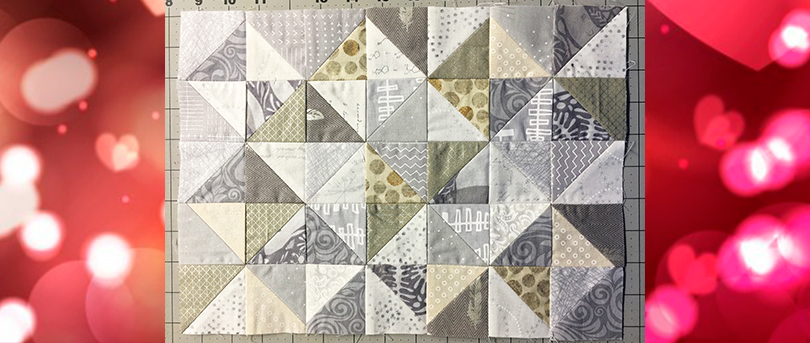
8. Place row 1 and row 2 RST and match the seam intersections. Sew together with a ¼” seam allowance. Repeat this step with the remaining rows until you have one solid piece, measuring approximately 10½” x 14½”. Press all seams.
Quilting the front exterior and back exterior pieces
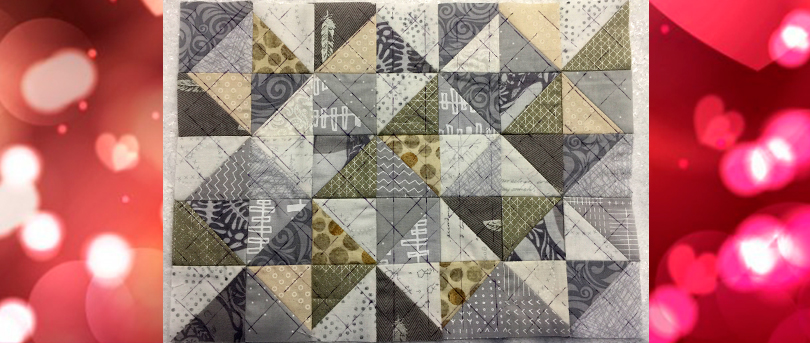
9. Using a ruler and marking utensil, mark the panel in 1″ increments, diagonally, from corner to corner. Then change directions and repeat the 1″ markings perpendicular to the ones you just made.
Take one of the 13″ x 18″ pieces of fabric C and place it RSD on a flat surface.
10. Take one of the 13″ x 18″ pieces of cotton batting and place on top of that, layer a 13″ x 18″ piece of Insul Bright on top of the cotton batting. Then place the pieced panel you just marked RSU on top of the Insul Bright. Use basting pins to secure the layers.
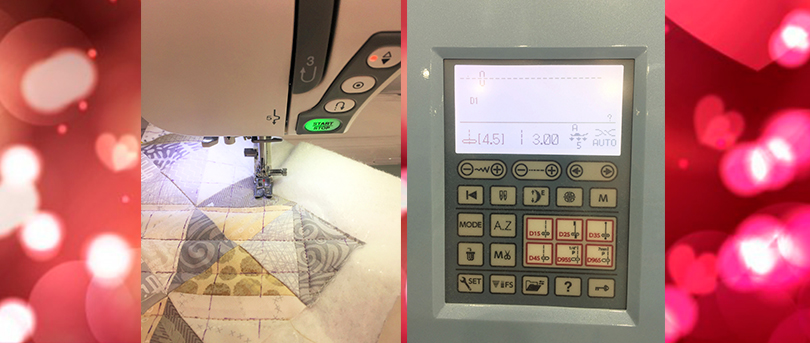
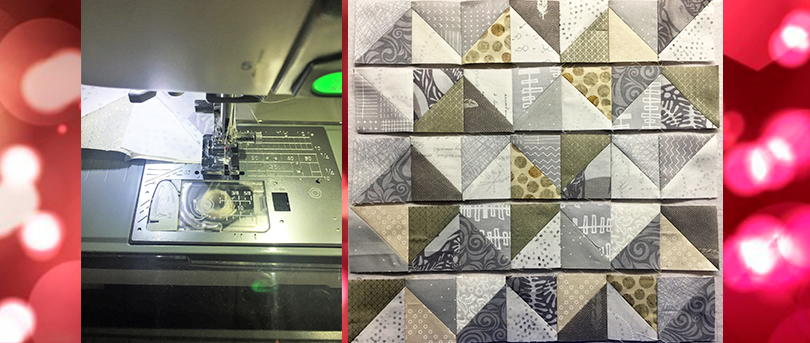
11. Change the foot to the AcuFeed Flex Holder and Foot and select the “D1S” button to change the needle setting on the MC8900. Lengthen the stitch length to 3.00. The AcuFeed Flex Holder and Foot will help to evenly feed all the layers through the machine to prevent any puckering.
12. Use the quilting thread you selected to quilt the grid lines marked on the pieced panel.
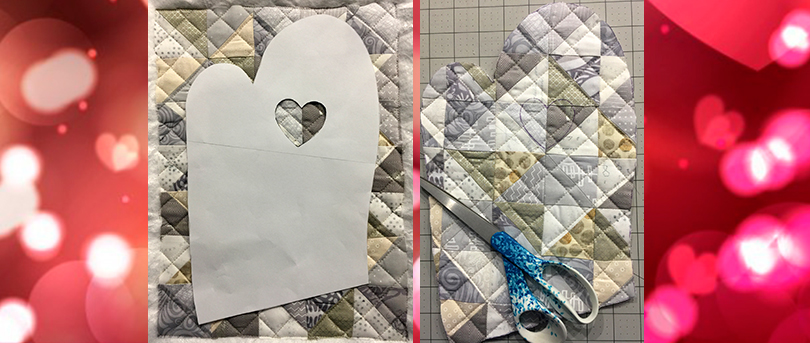
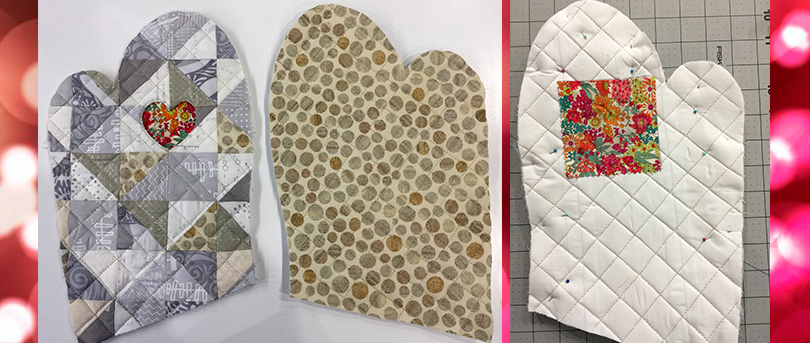
13. Print and cut out the oven mitt template at 100% (Download the template here). Tape the two template pieces together by lining up the two arrows in the middle of the template. Cut out the heart shape on the template as well. Place the template over the quilted panel and use a marking utensil to trace the perimeter of the oven mitt and the heart shape. Cut on the outer lines to cut out the front of the oven mitt, but don’t cut the heart out yet.
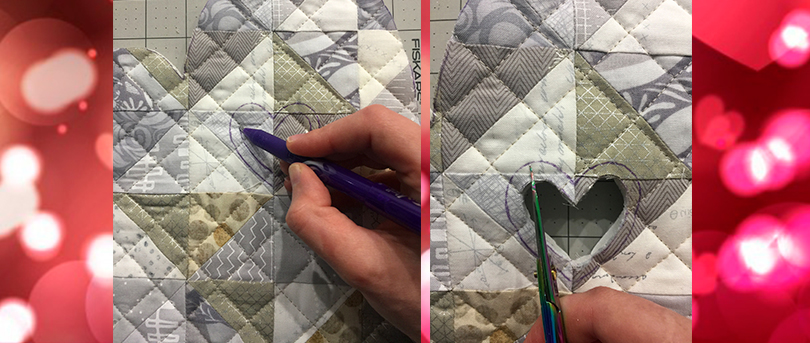
14. With your marking utensil, mark another heart 3/8″ inside the already drawn heart. You will cut out the inner heart only and use the outer marks as a guide for the reverse applique. Use a pair of sharp embroidery scissors to cut the center of the heart out. Then make small notches within the 3/8″ guide to help turn under the fabric for the reverse applique. You can also trim some of the batting back on the wrong side of the front if needed, to reduce bulk.
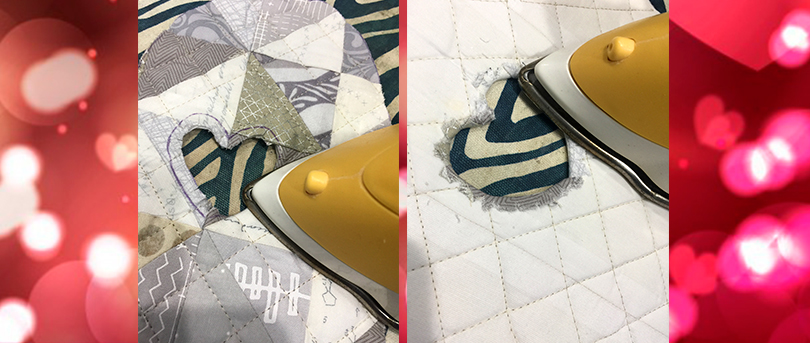
15. Use steam from your iron to press the 3/8″ inside of the heart to the back side of the quilted panel. To keep the notched fabric in place, you can put a thin line of Elmer’s School glue and heat set with the iron.
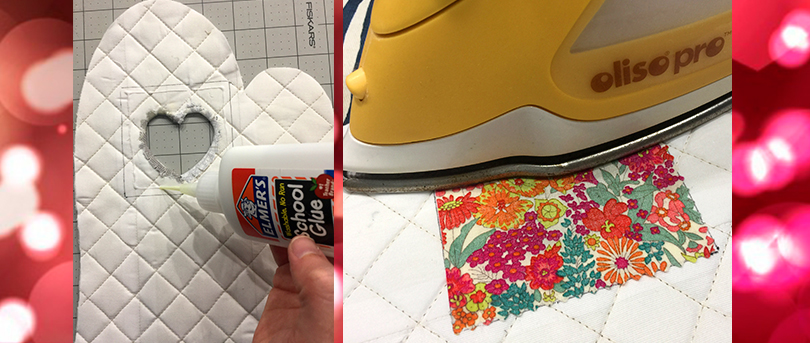
16. On the wrong side of the quilted panel, draw a 3½” square centered over the heart cut out. With the glue tip, place a thin line of school glue about ¼”-1/8″ from the inner edge of the line you drew.
17.Place the 3½” square of floral fabric B inside the square drawn on the wrong side of the quilted panel. The floral fabric B should be wrong side up. Heat set the glue with your iron.
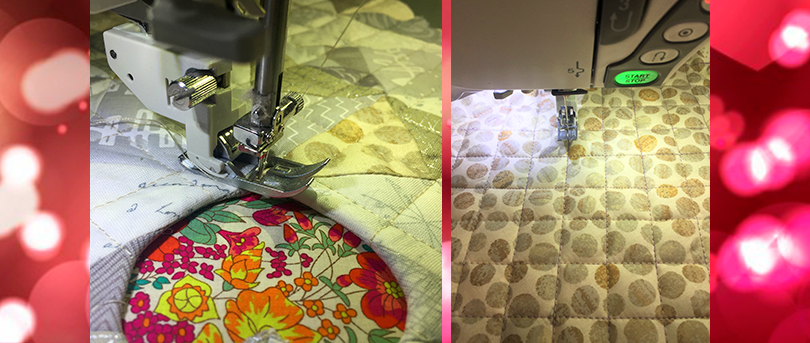
18. Take the panel to the MC8900QCP and topstitch 1/8″ from the edge of the heart.
19. Take the 12″ x 16″ piece of Fabric E for the back of the oven mitt. Repeat steps 9-12, substituting this piece for the HST panel.
20. Place the front of the oven mitt right side down on top of the right side of the quilted Fabric E. Trace around the perimeter of the oven mitt front. Cut the shape out of the quilted fabric E so that you have mirror image pieces.
21. Place the pieces right sides together and pin to secure.
22. Sew together with a ¼” seam allowance, leaving the hand opening unsewn. Turn right side out.
Assembling the oven mitt
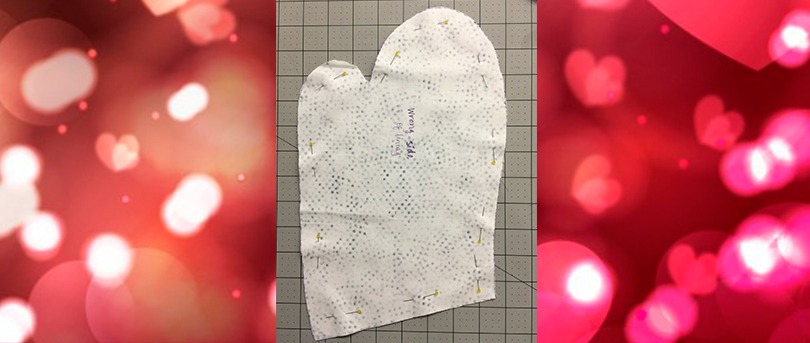
23. Take the 18″ square piece of the lining (fabric D) and fold it in half, right sides together. Place the template on top and trace around the outer perimeter (not the heart). Pin the two layers of folded fabric together just inside the traced lines and cut the oven mitt shape out. Leave pinned.
24. Sew together with a 3/8″ seam allowance. Leave the hand opening unsewn. Trim the seam allowance down to 3/8″-¼”. Leave the lining with the wrong side out, don’t turn.
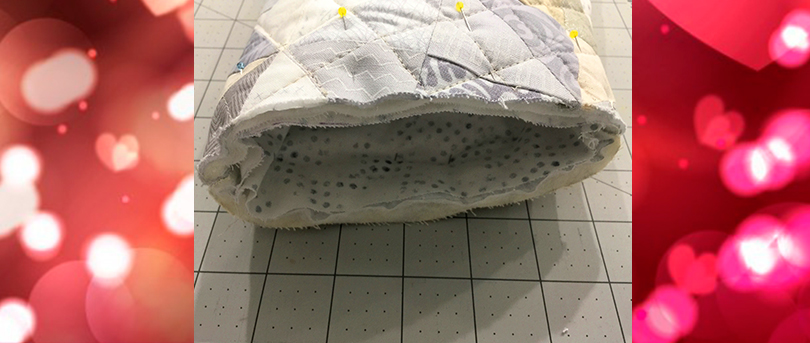
25. Place the lining, still wrong side out, inside the exterior of the oven mitt, pushing the mitten part and thumb part inside to match the seams. Match the side seams, and pin around the hand opening to secure the two layers in place.
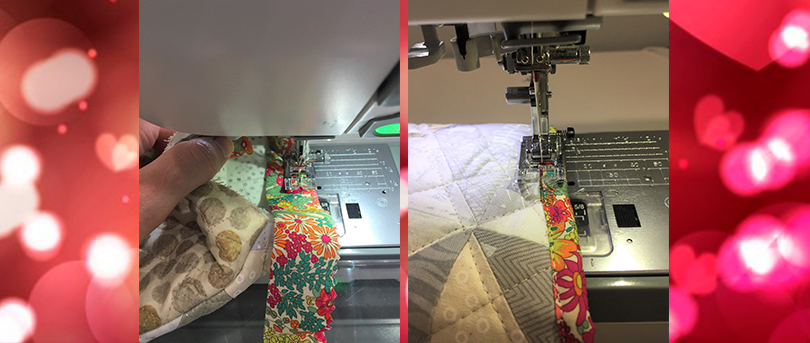
26. Prepare the fabric B binding as you normally would and sew to the inside of the oven mitt, carefully adjusting the mitt as you sew with a ¼” seam allowance.
27. Fold the folded edge of the binding over to the exterior of the oven mitt and stitch in place, about 1/8″ from the folded edge of the binding.
To download and print the PDF, click here.
 eBook 60 Pieced Quilt Borders: Mix & Match
1 × $19.95
eBook 60 Pieced Quilt Borders: Mix & Match
1 × $19.95  eBook A Baltimore Album: 25 Applique Patterns
1 × $19.95
eBook A Baltimore Album: 25 Applique Patterns
1 × $19.95