At American Quilter’s Society, we’ve always got an eye on quilting trends. From innovative techniques to returning classics, there’s a trend for everyone. This month, we’re trying Hand Embroidery.

Hand embroidery is a needlework art form that uses colored thread, usually thicker than sewing thread, to create images and patterns. It’s largely used for decoration and it’s been around for a long time. There are archaeological finds of fossilized embroidered clothes, hats and boots dating from around 30,000 BCE. Different cultures the world over have unique hand embroidery techniques, styles, and even cultural significance. We’re going to focus on a few basic stitches, how embroidery compliments quilting, and show you a few projects for getting started on your own hand embroidery journey!
How to Try This Trend
Hand Embroidery Supplies

- Fabric
- Embroidery Hoop
- Floss
- Needle
- Small scissors
- Marking tool
More About Needles
Needles for hand embroidery come in all shapes and sizes. Below are a few common choices.

Left to right: tapestry needle, chenille needle, embroidery/redwork needle, and sashiko needle.
Tapestries have a large eye, short shaft, and blunt tip. They are most commonly used with counted cross stitch and aida cloth, as shown below. The blunt tip and large eye lets the floss pass through the aida cloth without piercing the threads of the cloth.

Below are the sashiko needle, redwork needle, and chenille needle. All three of these needles have sharp points, but the shafts and the eyes make them well suited to different tasks. The sashiko needle has a long shaft and a small eye that is even with the shaft; sashiko is usually worked with thread similar to a perle cotton, allowing for a smaller eye. The redwork needle is a size 7, meaning it has a long shaft, but embroidery/redwork needles come in varying sizes, shorter the higher the number. Notice the thinner shaft of the redwork needle, it is best for working with 2-3 strands of floss. Finally, the chenille needle is comparatively short, but the eye takes up a large proportion of the needle and it is a good deal wider than the shaft. The chenille needle is great to use when working with more than 3 strands of floss or even with yarn.

Try to find a variety pack of embroidery needles when you start. Finding a needle length you like is important, and you can expand your needle collection to suit your projects after that.

The needle above is a size 7 embroidery/redwork needle.
Design Transfer
There are tons of great tools for transferring patterns to fabric. But a simple pencil is all you need to get started.

Below I’ve freehanded “Quilting on Together” onto a piece of fabric using a Sewline Trio Colors Fabric Pencil. I love this pencil because it has three colors that make it easy to mark clearly on any value of fabric.

It also has an eraser which I’ve used to take a second pass at the loop of the Q.

There we go! All set. It’s that easy to start. If there’s an image you want to trace, you can use a window like a light box.
Hooping the Fabric
Hoops come in all shapes and sizes, but generally speaking, a hoop has a solid ring and an adjustable ring which fit together. The hoop maintains even tension for improved stitch quality. The hoop I’m demonstrating on has the solid ring on top and the adjustable ring on the bottom, but other hoops work in the reverse.
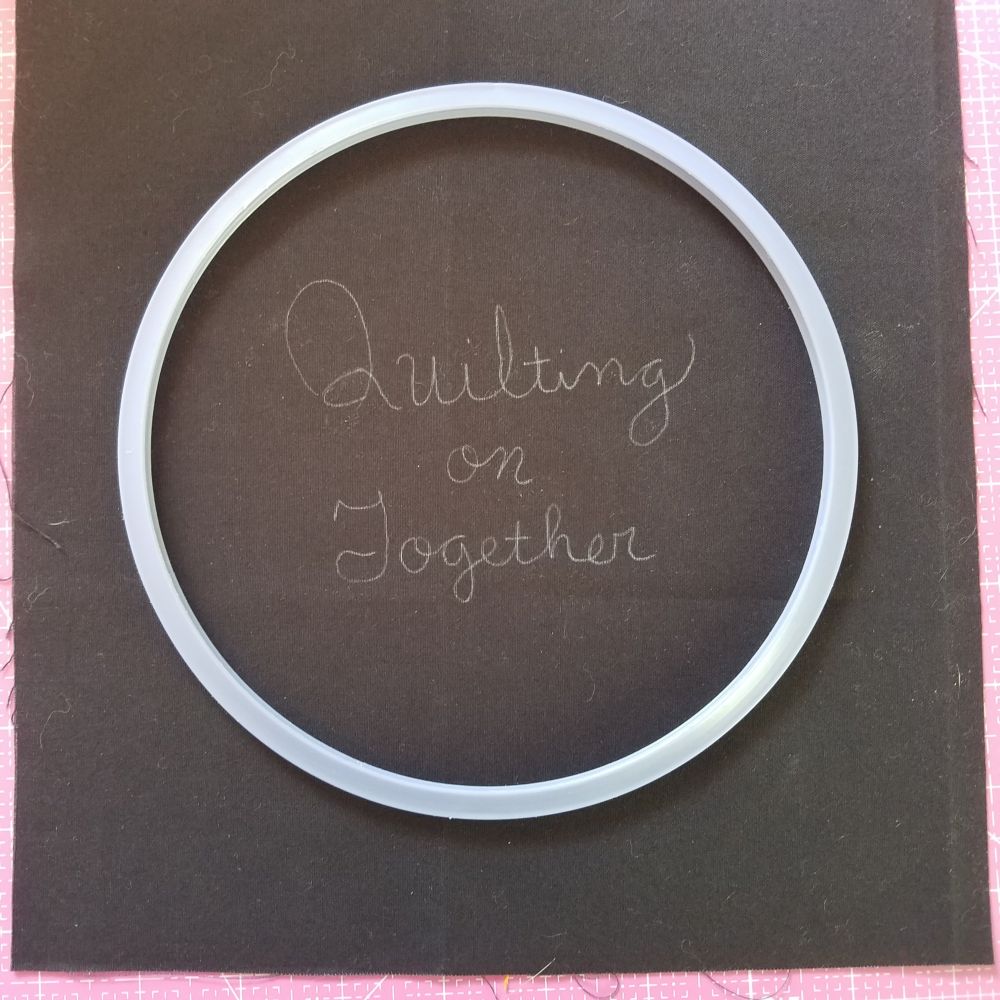
To begin, lay the solid hoop over the area to be stitch. Holding it in position, flip it over so the hoop is on a flat surface and the fabric is draped over it.

Then fit the adjustable hoop to the solid hoop, securing the fabric between them.

Always unhoop when you are done working on the project for more than an hour to reduce creasing. Leaving a project in the hoop while you grab lunch is fine, but overnight can cause creases.
To Knot or Not to Knot
There are a few different ways to start and end embroidery without using knots. They make for beautiful clean backs and prevent bumps for mounted pieces. But hand embroidery used for quilting can be knotted. The batting of a quilt will cushion any knots, so bumps aren’t an issue, and if the piece is going to be used, the security of knots can give you peace of mind. Plus, this is practice! Knots are fine for now, but knot-free embroiders? Hats off to you.
Instructions for tying a knot with either hand shown below, first right then left.

To begin, thread the needle and create a U, with the needle on the side of your dominant hand and the tail on the other side.

Holding the needle in your dominant hand pinch the tail between the needle and your forefinger.

Use your non-dominant hand to wrap the tail around the needle a couple times, catching each loop and holding it against your forefinger.

Then pinch the loops between your thumb and forefinger, holding the loops securely, but not so tight that it’s impossible to pull the needle through.

Pull the needle through and keep holding the loops, holding them and pulling the thread all the way through.

Tug the knot tight to finish.
Left-handed: Thread the needle and make a U with the tail, holding the needle in your left hand.

Wrap the tail around the needle a couple times. Pinch the loops and pull through, continuing to hold the loops until you reach the end of the thread.

Tug the knot to tighten.

This is sometimes called a Quilter’s Knot and it’s good for starting stitching.
Tying Off
At the end of stitching, tying off is a good way to secure the stitching. Here’s how to do it.

From the back of the fabric, pass the needle between the last stitch taken and the fabric.

Start to pull the thread through and pass the needle through the loop that forms.

Pull to tighten the knot.

Repeat this one more time, perhaps piercing the first knot for extra security.

Cut off the excess, leaving a small tail.
Stitches
Running Stitch
Right handed:
Bring the needle up to the top of the fabric.

Put the needle into the fabric using your dominant hand, and then use your non-dominant hand to push it back up to the top of the fabric.

When you get comfortable taking one stitch, you can take multiple at a time.
Left-Handed:
Bring the needle up to the top of the fabric.

Put the needle into the fabric using your dominant hand, and then use your non-dominant hand to push it back up to the top of the fabric. It can be easier to work left to right, but experiment and see what feels right for you!

Running stitch is a fun stitch for creating a variety of looks. Even spacing of the stitch and space between stitches like shown above implies neatness and simplicity. A variety of long and short stitches and irregular spacing implies spontaneity and folksiness.
Bonus: The Seed Stitch!
Seed stitch is way to use straight stitches to fill in an area. Small, randomly arranged stitches look like little seeds tossed down at random.

Back Stitch
Right Handed:
Bring the needle up to the top of the thread. Then backtrack to start a new stitch and come up and equal distance away from where the thread came up originally. Pull through.

To take the second stitch, put the needle down the same hole as the end of the previous stitch, then bring the needle back up an equal distance ahead of where the thread is coming up out of the fabric.

Repeat as needed, and then to end, put the needle down in the last hole of the previous stitch, but don’t come back up to the top of the fabric, tie off instead.

Left Handed:
Bring the needle to the top of the fabric, then backtrack to start a stitch and come out an equal distance ahead.

Repeat as needed. It can be easier to work left to right, but experiment and see what feels right for you. I actually work all my back stitches coming towards me vertically, rather than left to right or right to left.

Back stitch is great for outlines! Long stitches can cover lots of space quickly, and smaller stitches make it possible to create smooth curves.
French Knot
This stitch isn’t directional, so there aren’t photos demonstrating it left-handed, but the instructions will be hand-neutral.

Bring the needle up to the top of the fabric, then place the needle over the floss, pinning it against the fabric.

Wrap the floss around the needle. You can experiment with different numbers of wraps for different sized knots.

Two wraps is a pretty common knot size. Use your non-dominant hand to keep tension on the tail and keep the wraps on the needle.

Place the needle down into the fabric a thread or two away from where the needle came up originally. Keep hold of the wraps as you pull the thread through.

This knot can be tricky, but keeping the thread tidy as you pull is the trick to neat knots.

Use your dominant hand for pulling the thread from the back and your non-dominant hand for controlling what’s happening on top of the fabric.

French knots are like 3-D polka dots, but they can be used to fill areas. Using french knots for fills isn’t for the faint of heart, but it creates amazing texture. Above from left to right are french knots with 2, 5, 1, and 3 wraps.
Lazy Daisy
Bring the needle up to the top of the fabric and put it back down into the fabric a couple threads away. It may be more natural to put the needle in to the left or right, depending on your dominant hand.

Bring the needle back up above where it went down. The size of the stitch you take here really can affect the look of this stitch, so play around with it once you get the movement down. Wrap the tail of the thread under the needle before pulling through.

Pull the floss through, but be careful not to create too much tension in the loop to prevent flat lazy daisy stitches. (You can pull them tight for effect later when you experiment.)

Hold the thread with your non-dominant hand and create light tension.

Put the needle back in right under where the loop sits on the fabric, but not catching any of the floss from the loop. The goal is to make a small securing stitch to hold the loop. (Again, you can take a larger stitch for a different effect later when you’re experimenting.)

This creates a single lazy daisy stitch! You can repeat this anywhere in any arrangement, but usually a set worked in a circle make an actual daisy.


How cute is that? And you can add a french knot to the middle!
Want to try more hand embroidery?
Check out 3 Stitches Every Quilter Should Know for two more stitches we didn’t cover here.
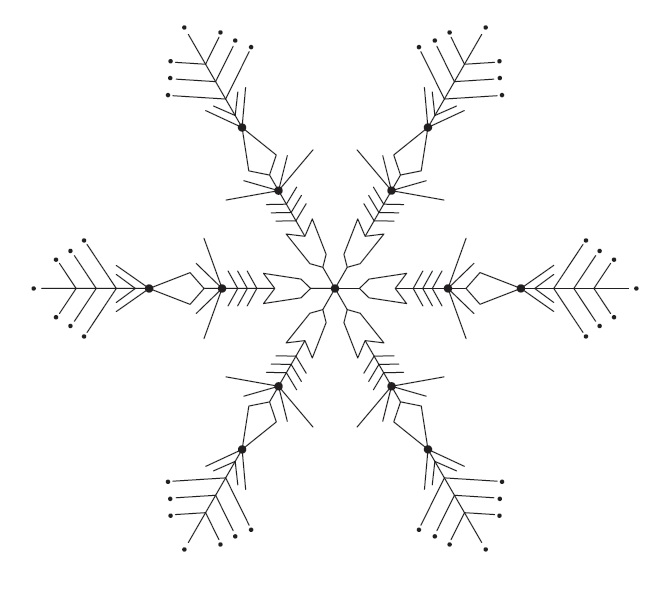
Joan Waldman shares ideas on how to take a simple base stitch design and build on it to create different effects.
Curious about how other quilters use embroidery? We already asked them and you can read all their answers!
Embroidery and bead embellishment go hand in hand. Learn how by clicking here.
Learn how to tint fabric with crayons to enhance your embroidery.
Get ideas for decorating using Sashiko and learn how with iquilt instructor Carol Ziogas!
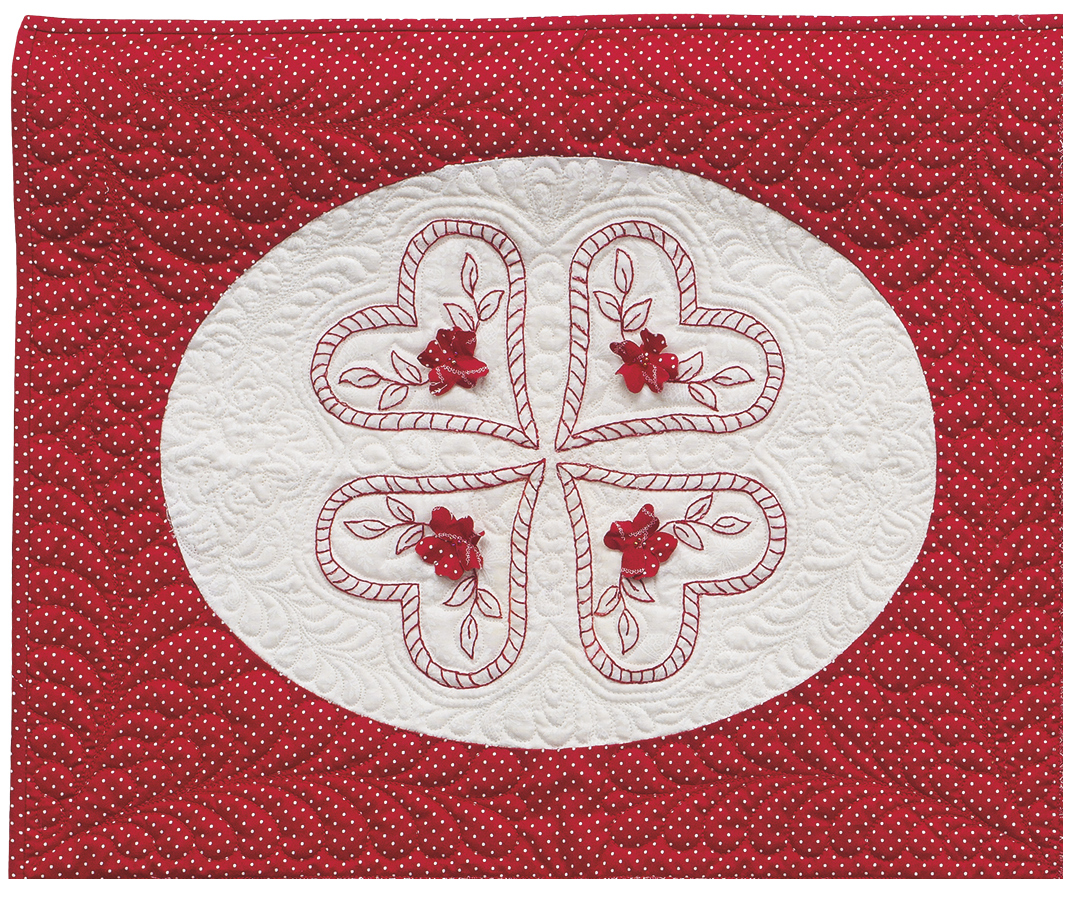
Free Projects
Click on the pictures to go to the free patterns!


Members Get Even More
Over in our AQS Member Area, we have great projects for all kinds of quilters.
Check out the 30 Days series for patterns that can be embroidered.


Ready for more inspiration?
Check out our Must-Try Pinterest board full of trendy eye-candy to get inspired.
Have you tried this trend? Show us your creations in our Facebook group, AQS Quilting Project Parade. We can’t wait to see what you make!