Last week we covered the basics of English Paper Piecing (click here to read that article). This week, we’re going a little more in-depth on how to assemble all the basted pieces together following an assembly guide. We’re using block from the 50 States series to demonstrate ways around Y-seams, and strategies for dealing with Y-seams–seams that are interrupted with a sharp turn. We’re going to use the EPP assembly guide from each block and break it down even more.
Kentucky – No Y-Seams
Click Here for the Free Kentucky State Block pattern!

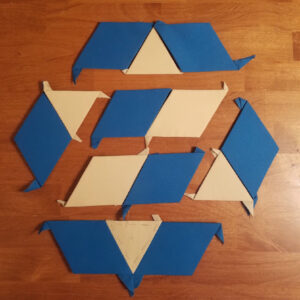
The block is a hexagram made up of diamonds and triangles made using EPP. Let’s take a look at the assembly diagram.

This diagram shows how to assemble the rows, but we can break it down into pairs and trios of pieces to avoid all Y-seams.
By splitting up the center row, we’re able to sew all straight lines.
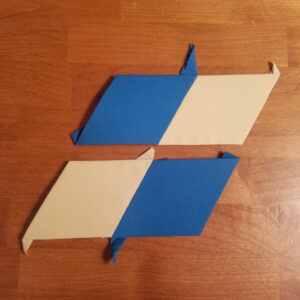
Start with the center pairs, and then join the pairs together.
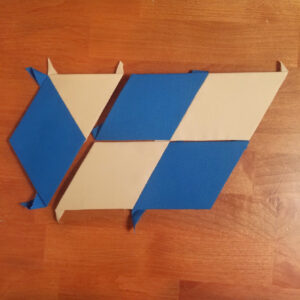
Sew together the left side and join it to the center.
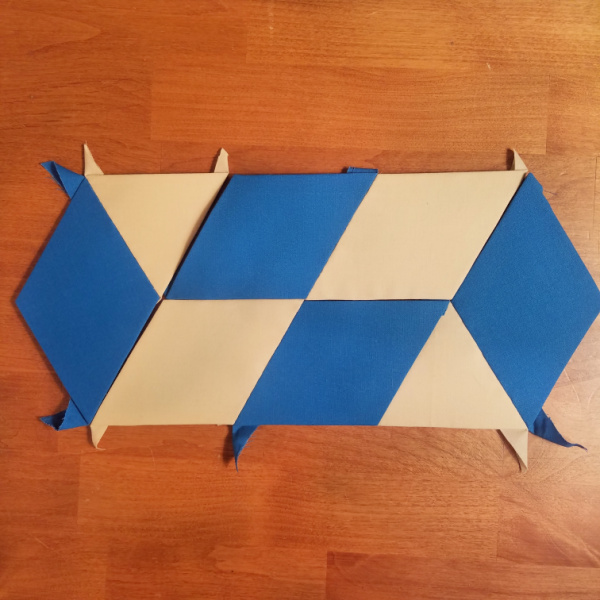
Repeat on the left to complete the center row as shown in the diagram.
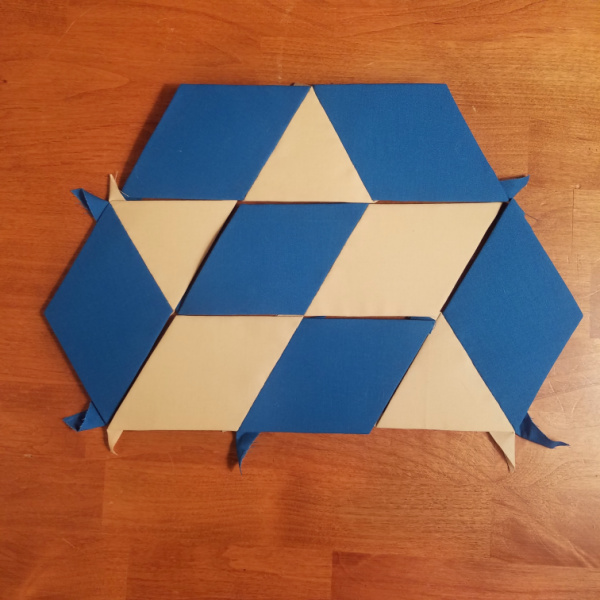
Add the top row…
And the bottom row to complete the block!
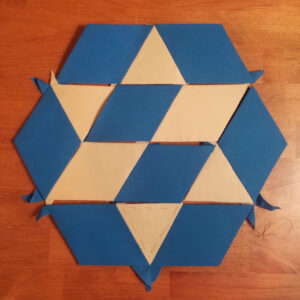
West Virginia – Y-Seams
Click Here for the free West Virginia State Block pattern!
Sometimes Y-Seams are unavoidable, like in the West Virginia State Block.

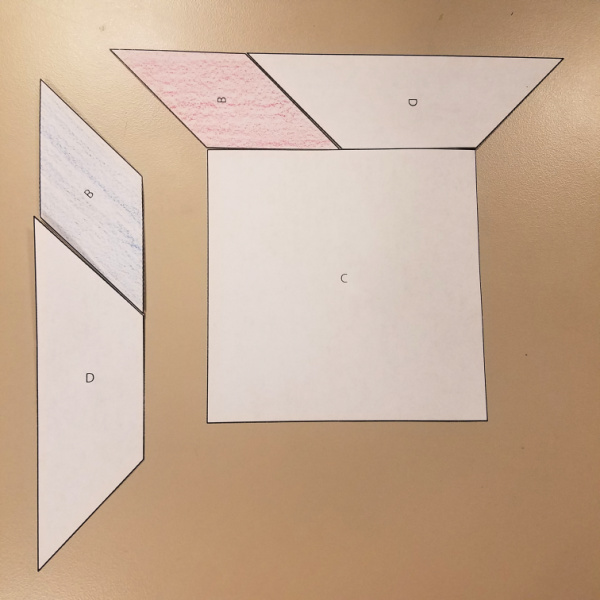
And the EPP assembly guide shows us how to piece together large sections.

We can break it down into pairs and trios for easier Y-seams.


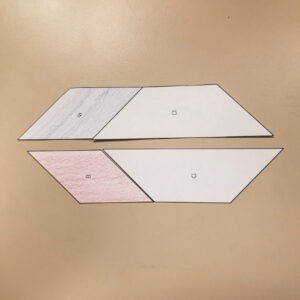
When planning for a Y-seam, it’s easier to sew wider angles than tight angles. The first photo shows a tight Y-seam and the second a wider Y-seam.
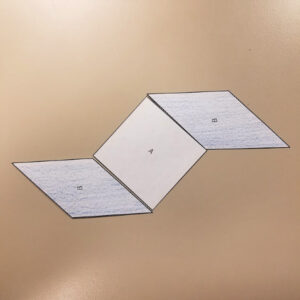
Knowing what we’d rather sew, we can set ourselves up for that in the first step.
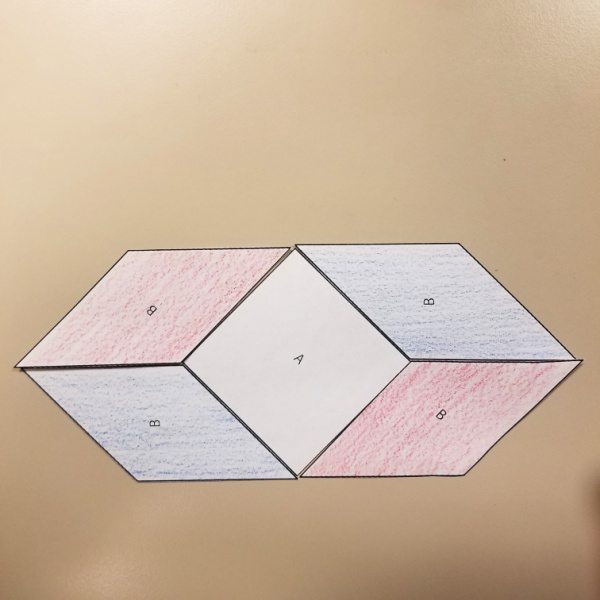
Then add the red B pieces to complete the unit.
Next, we can break the corner unit down into duos.
Add one side and then the other to the C square.
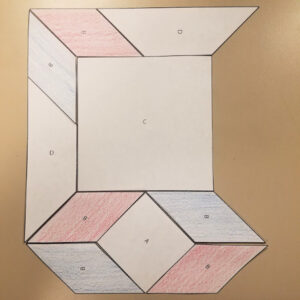
Join the two units together. Make 4 of these to complete the block.
Experiment & Plan
When you start an EPP pattern with an assembly guide, look for ways to break down the block into even more simple lines. It’s easy to lay out the paper pieces, experiment with the best choices for you, and take a picture or draw your plan. This is also a great way to make your own assembly diagram if you’re working from a shape without a written pattern.
When piecing, don’t be afraid to bend the papers to achieve the position, but be careful not to crease the paper.
Come back next week to learn about English Paper Piecing curved shapes!
 eBook An English Paper-Pieced Sampler
1 × $18.95
eBook An English Paper-Pieced Sampler
1 × $18.95  eBook Anna Williams: Her Quilts & Their Influences
1 × $9.95
eBook Anna Williams: Her Quilts & Their Influences
1 × $9.95  eBook 400+ Embroidery Stitches for Quilts & More
1 × $9.95
eBook 400+ Embroidery Stitches for Quilts & More
1 × $9.95  eBook America's Quilted Garden Blocks
1 × $18.95
eBook America's Quilted Garden Blocks
1 × $18.95