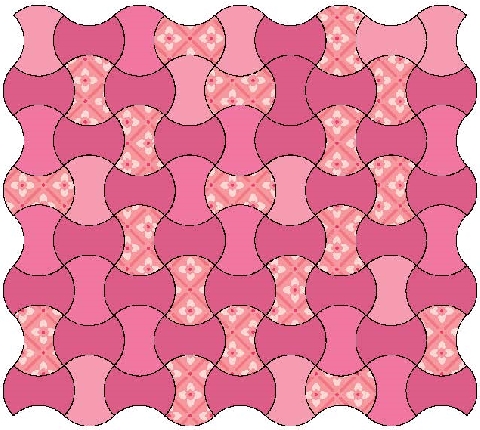
With just one shape, you can make a unique quilt! For centuries, quilters have been switching up the colors of their pieces for a wide array of effects. AQS Vintage One-Patch Block #6 is The Apple Core Block. Have some fun with this unique shape!
Block #6: The Apple Core
Apple Core quilts were very popular in the first half of the 20th Century. The Apple Core was also called Mother’s Oddity in Capper’s Weekly in 1928. Long time Capper’s Weekly editor Louise Fowler Roote originated quilt patterns in the publication beginning in February 12, 1927. Louise wrote under the name Kate Marchbanks. The block was also a common feature in friendship quilts patterned in the Kansas City Star in 1930.
Click HERE for the Apple Core block template pattern in three sizes plus pages of shapes to print. Experimenting with colored pencils or crayons is suggested just for the fun of it!
Stitching by hand or English paper piecing is suggested, and don’t forget to clip the curves for easier stitching.
We hope you’ve enjoyed the AQS Vintage One-Block Pattern Series. Looking for previous AQS Vintage One-Patch Blocks? Here are the links!
To make the templates:
• Trace the templates onto heavy cardboard or plastic.
• Cut along the line so the template matches the measurement. Verify with a ruler.
The templates have NO seam allowance added. This allows the sewing line to be transferred to the wrong side of the fabric as the template is traced around.
To use the templates for hand piecing:
• On the wrong side of the fabric, lay a template, leaving at least a ¼” around each of the edges.
• Trace the template with a marking pencil or pen. Chalk can also be used, but it is important the drawn line remain for use later. Disappearing ink is NOT recommended.
• Continue tracing the template on the wrong side of the fabric leaving room for the seam allowance between pieces until the desired number of pieces are traced.
• Cut around the drawn pieces leaving the ¼” seam allowance. Because the drawn lines are the sewing lines, it is not critical that all seam allowances be completely accurate.
• Store marked pieces in a plastic bag or a box for safekeeping.
A few guidelines for hand piecing:
• Pin two pieces together marking the beginning and end of the seams lines with pins.
• Using a sharp or milliner needle and waxed hand piecing-weight thread, thread the needle and knot the end of the thread in a quilter’s knot.
• Hold the two pieces at each end creating an even tension on the fabric.
• Sew along the drawn line with a locked running stitch. Take four or five bites of fabric with your needle, no farther than 1/8″ apart, loading it up for a running stitch and pull the thread through. As you place your needle back in the fabric for the next stitch, begin before the last stitch of the previous running stitch. This includes the last stitch in the next and locks the stitch.
• When pulling the stitches secure, do not pull too much nor leave the stitches too loose. It is important to pay attention to maintaining even tension.
• Stop when you reach the end of the line where it connects to the next corner. Take a tiny backstitch, a single stitch that goes back over the sewing line, and pass the needle through the loop made taking the stitch. Repeat to secure the knot.
• When sewing units or rows together, take a lock stitch on one side where the seams meet, then pass the needle through the seam allowance and take a lock stitch on the other side of the juncture.
To English Paper Piece:
Are you interested in English paper piecing the shapes? Here’s a basic guide to English paper piecing. Cut templates from file folders or any bendable but sturdy paper.