About ten years ago, I bought a little set of papers from Paper Pieces at the AQS “Quilt Show” in Paducah, before we called it QuiltWeek, and long before I started working here. It included hexies (before the hexie craze), squares, and tiny triangles. I found a little stack of charm squares, cotton prints in light and dark colors, and got busy.
 This piece was the result of that first try at English Paper Piecing. I’ve pieced “a few” more since, but it’s a great example of taking what you have and trying something new!
Summer is upon us and there’s no better, more sociable take-along than English Paper Piecing. I can’t help but share the love, so here’s a little EPP 101 to show you that this gorgeous hand-stitched art is really very user friendly!
What is English Paper Piecing?
English Paper Piecing starts with a flexible paper “piece” that’s cut to perfection and a bit of fabric that’s cut a seam allowance larger than the paper shape.

Cutting the Fabric
No one is going to notice the seam allowances but you. You won’t want to make the seam too narrow for the sake of the stability of your project, but don’t stress about it. A casual quarter inch will be fine. This is one of the best and least stressful parts of EPP compared to other quilting styles.
You can “eyeball it” around the edge of your piece and just cut, or you can make a measured grid and rotary cut, depending upon your shapes. For hexies, you can start with squares and lop off the edges. I like to use a template to draw or cut around. You can make one yourself from cardboard or plastic by using your paper piece as a pattern and measuring ¼” around. You’ll only need one for each shape.
Getting more serious about EPP? Buying clear acrylic templates with seam lines on them will make you a fussy-cutting genius!
Thread Baste or Glue?
Next step? Fold the cut fabric over the paper and thread baste or glue the seam allowances snugly into place.
Thread basting is easy, portable, and the stitches are easily removed afterward. Try to keep thread basting limited to the corners except on longer sides/larger pieces, for easy removal. See the photo below. It’s okay to baste through the papers when needed. They will still be re-usable.
Start with your knot on the right side of the fabric (for easy removal later) and when possible, take a stitch at every corner and pull it tight instead of stitching through the paper. Knotting at the end is not necessary.
 If you are thread basting, it’s the perfect time to use up some of those bits and pieces of threads that are either old or have no place in your color world.
I loved thread basting until I tried gluing. I’m having a blast with my little Sewline glue pen now.
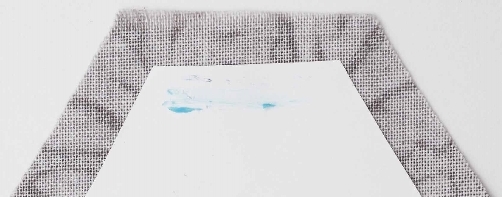
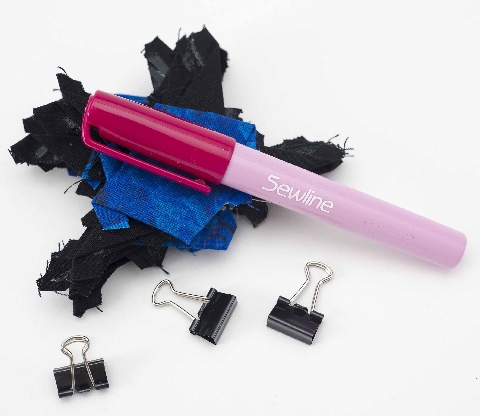 Just a little line will do, see the blue? Remember that it is temporary. Try not to get the glue on the edge of the paper because the next step involves stitching that edge.
 A touch of glue, fold, tug a tiny bit to be sure it’s tight to the paper, and keep moving! I like to crease it just a little with my fingernail to keep the edges sharp. No matter what shape you are using, neatly fold the edges so that the corners are distinct.
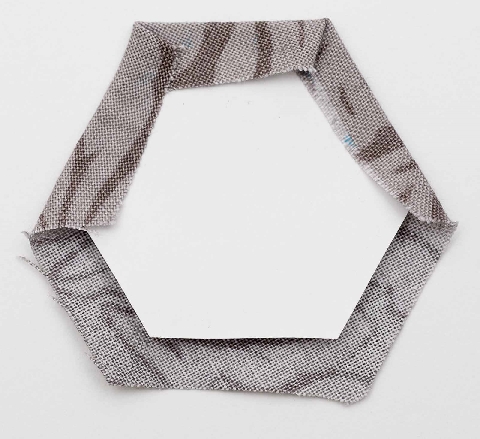
 Regardless of your technique, basting is a very important step. Retain the integrity of the shape and be sure that the fabric is snug around the paper edges, as the pieces will fit together like a jigsaw puzzle.
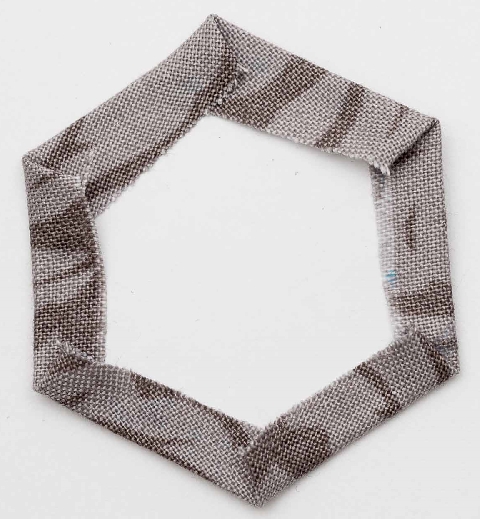
Always fold new over old when you come to corners, and keep them taut. Whether thread or glue basting, you don’t have to worry about the little tails that might form, especially on triangles—don’t snip them, and don’t glue them down! You’ll find that they fall right into place in the back as you sew.
Start with a few hexagons; they are easy to fold and sew!
 You’re ready to put the pieces together! A whipstitch, when used with a relatively light touch that includes just a couple of fabric threads on each side, keeps everything in sight and the result is neat and snug. Intricate seams that would be nearly impossible to accurately stitch on a machine become a fun challenge.
Use a light gray or a neutral that blends well. Some EPP’ers like to change threads to match the darker color of any two pieces. I like to stick with a neutral or gray throughout, or a color that blends when stitching a darker overall color scheme.
I’ve used quilting weight thread but I’m convinced that a lighter weight thread in a 50 weight for the whip stitching is the right choice. Needles are a personal preference; I like to use quilting needles. Betweens in the 8 to 10 range work well.
I’d love to hear what you choose, and what experiences you have with needles and threads when you English Paper Piece.
 To whipstitch, hold the two pieces together with the edges and ends exactly matching. You can use a tiny binder clip to hold them. Aren’t tiny binder clips so cute? Simply knot the end of the thread and pull it up through the seam allowance, through the corner of the fabric on one of the pieces. Bring the thread over, around and back through the other piece, beginning another stitch as you circle around. The bottom part of the stitch from this angle will be straight, the top a bit diagonal.
Don’t go through the papers, just catch a couple of threads on the edges of each of the folds! I like to make a little double stitch at the end of each seam. You can plan ahead and stitch more than one seam and keep going. When corners meet, I like to take an extra stitch into the corner to pull the corners in snugly to each other.
When turning inset corners and other more complicated shapes, don’t hesitate to bend the papers. It’s there to keep things in shape, and the basting will keep the fabric attached.
How many stitches per inch? I use about 12-15 and my pieces are perfectly sturdy. Some EPP stitchers use up to 20-25 per inch. To that I say…wow!
When your stitching is done, remove the papers and the basting threads. If you’ve glue basted, a little heat from your iron should set them free and pressing will make your finished work look great!
About the Pieces
Of course, the paper pieces are the most important part of English Paper Piecing. They must be accurate, and fit together perfectly.
I’ve made some paper pieces, and I won’t do that again! I found pages of geometric shapes on the Internet and printed them on card stock. No matter how carefully I tried, it was almost impossible to cut the pieces as accurately as the die-cut purchased ones. Since accurately connecting angles are one of the joys of EPP, it’s easy to be off just a little…with each piece, it adds up to a little more…and before you know it, your whole design is off. If you want to try it, find pages with the thinnest lines possible and cut very, very carefully.
And never, ever use your fabric scissors on anything but fabric. (Thanks, Mom!)
Using precision cut papers as a guide means every single piece will be the right size, and all the edges will be crisp. All the points, corners, and angles line up—it’s amazing!
You’ll find some differences in the weight and quality of papers from different manufacturers.
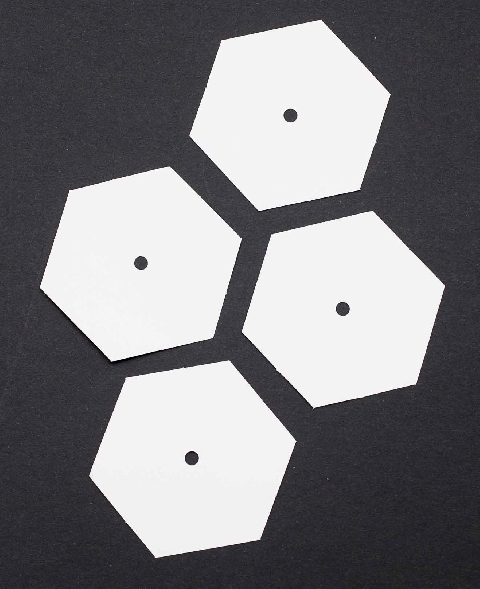 Some paper shapes have a unique hole in the center of each die-cut piece. The hole in the center of each hexagon, diamond, and tumbler paper piecing shape is big enough to take a tiny pin bite to secure larger pieces, or for tucking a pointed object—like the back side of your seam ripper, a tiny crochet hook, or a stilleto—under the paper to pluck it out when you’re done.
 I’ve had the most experience with die-cut papers and templates from Paper Pieces. They have an amazing number of shapes and sizes to choose from.
The weight of both of these quality papers is stiff enough to easily shape the fabric to perfection, yet flexible enough to remove the piece from the fabric. Both hold up well to glue or thread basting. And the time saved is well worth it; you can start your project right away!
A note to remember about pieces: While you’ll want plenty of papers to work with, you don’t need to have the exact number of paper pieces required to make the project you have in mind. They are reusable. Some EPP stitchers like to have a complete set and take all the papers out at the end. If you prefer to work with (and buy) a smaller amount, be sure to leave the edge pieces in place for the sections you’ll continue to connect.
Here’s a sneak peek at the project I’m working on. I’ve been glue basting like a speed demon, and stitching every time I get a chance. I’m finding out that tiny is good. And color is wonderful.
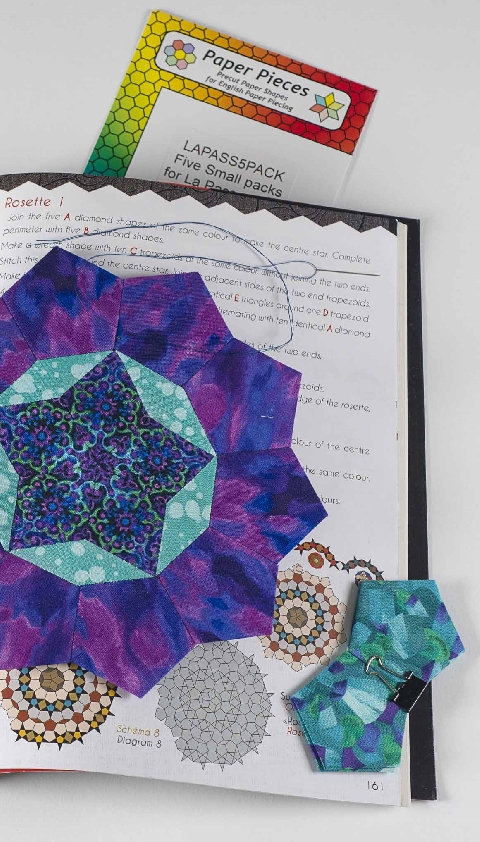 I’ll tell you more about my project and pass along some tricks shortly. There’s so much more EPP to talk about!
Til then, I’ll be relaxing with my stitching and a cup of hot tea on my back porch on lovely Saturday mornings when the air is fresh and the birds are singing. And warm Paducah summer evenings, too…and I’m considering bringing some pieces to stitch at lunchtime…
It’s that addicting.
Enjoy. And let me know how it goes.
goes.
Ann Hammel
The Back Porch Stitcher
ann.hammel@americanquilter.com