Start creating special presents for Valentine’s Day now! With little sewing involved, this is a great project to do with kids. Use paints or sequins for fun embellishments!
When two hedgehogs meet nose to nose, love is in the air! Make a cute 12″ x 12″ Hedgehog Heart Pillow to celebrate these two little cuties from the AQS Forest Friends series.
Hedgehog Love Pillow
12″ x 12″
Fabric Requirements:
Background (Pillow) fabric: ½ yard
Three assorted browns: fat quarters or scraps
Instructions:
1. Trace the hedgehog patterns onto the printed side of Steam-A-Seam (iron fusible). Click HERE for the free Hedgehog Applique Patterns.
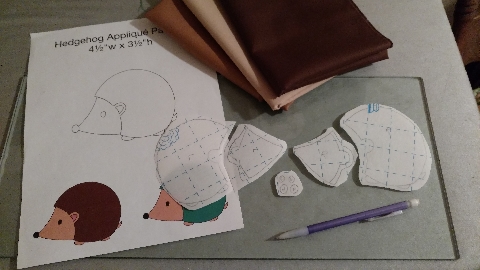 Draw the overlapping pieces separately, adding a little extra to the ear side of each face piece so that the body fabric can be laid over it for added dimension. You may choose to simplify the pattern by adding the feet and tail to main body piece.
2. Cut out the pattern pieces, leaving extra paper around each piece.

3. Remove the backing paper and press the pattern to the backside of the fabric.
• Main body of hedgehogs – dark brown
• Face of hedgehogs – medium and light brown
• Nose and eyes – dark brown
4. Cut out the pattern pieces on the traced lines and remove the second piece of the Steam-A-Seam paper.
5. Lay out the hedgehogs on the right side of the background fabric. Be sure you have plenty of room to center the hedgehogs in a 13″ square.
• To help with layout, use a ruler to place the main body of the hedgehogs. Add the faces. Re-position the bodies as needed to fit the faces.
6. Iron the hedgehogs in place.
7. Embellish as desired with stitches, embroidery, paint, or other medium.
Pillow Instructions:
1. Fold the background piece in half with the hedgehogs facing up. Center the hedgehogs and cut a 13″ square.
2. Using a jar, trace a circle at the corners of the pillow to round them off. Trim off the points.
3. Sew the front and back of the pillow right sides together, leaving an opening at the bottom.
4. Turn the pillow right side out and stuff.
5. Slip stitch the opening closed.