This May, we’re exploring English Paper Piecing. We started by covering the basics of English Paper Piecing (click here to read that article). Then we went in-depth on how to assemble all the basted pieces together following an assembly guide (click here to read that article). Now we’re going to tackle curved English Paper Piecing. We’re using a block from the 50 States series to demonstrate a glue basting technique and stitch that will have you jumping to sew some curves.
Click here for the free Utah State Block pattern!

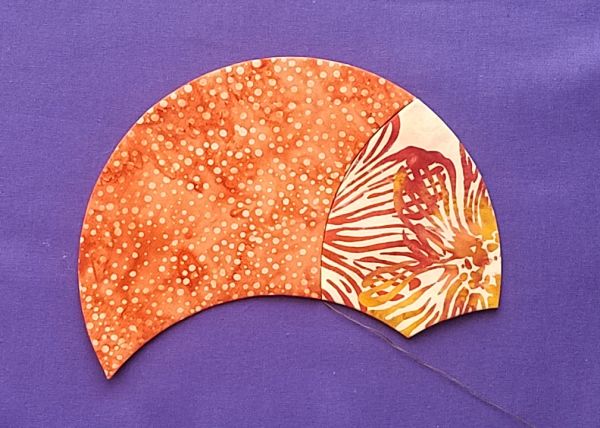
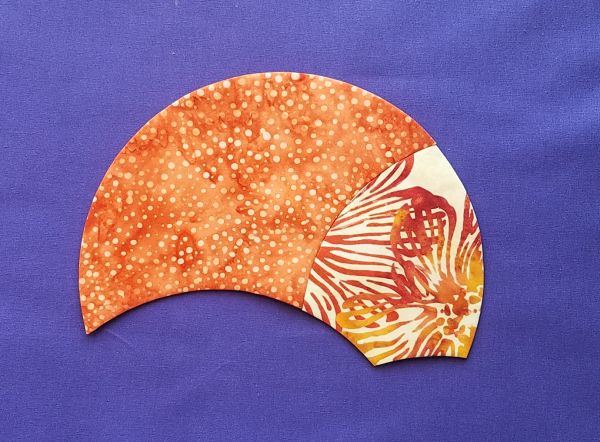
The block creates an illusion of transparent overlapping circles. This effect is achieved with curved English Paper Piecing.
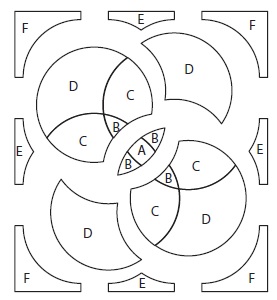
We’ll use a D and C piece to demonstrate how to curved English Paper Piece. To begin, cut out the paper pieces using a pair of paper scissors.
Cutting Instructions
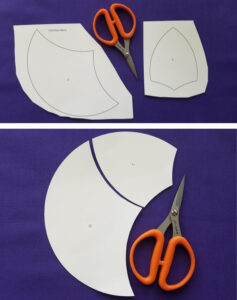
Lay the pieces together to check their fit. If there seems to be a little discrepancy, try cutting the pieces out to the inside of the black outline. Take your time.
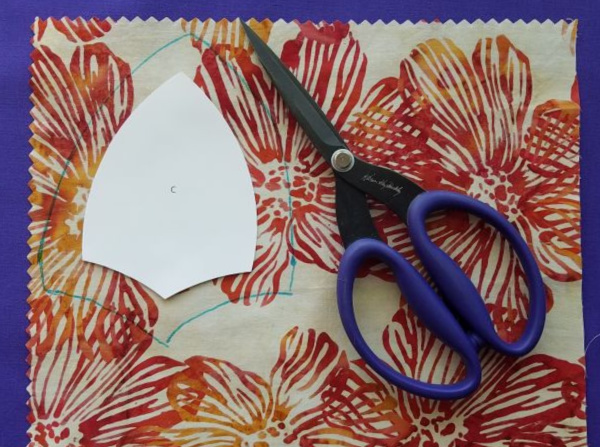
Using a pair of fabric scissors, cut out around the paper shape with a generous seam allowance. The Utah D and C pieces are several inches large, so we used about 1/2″ seam allowance, marked here in blue.
Glue Basting Piece C

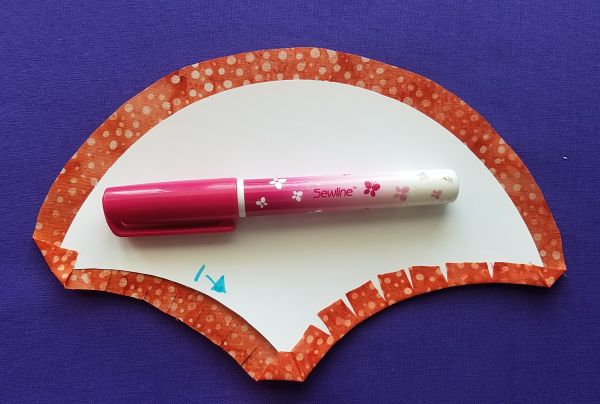
This is a Sewline Fabric Glue Pen. It’s a water-soluble glue stick with a thinner applicator than most glue sticks that makes it great to use with fabric. It’s great for paper piecing because it hold the fabric well, but releases easily when it’s time to remove papers.
It’s a little hard to see the glue in photographs, so we marked with a blue marker all the places we’re applying glue in each step.
The shield-shaped C piece features a lot of corners, concave curves (innies), and convex curves (outies). For sharp corners, begin by adding a dot of blue at least 1/8″ away from the edge of the paper piece and fold corners as shown.
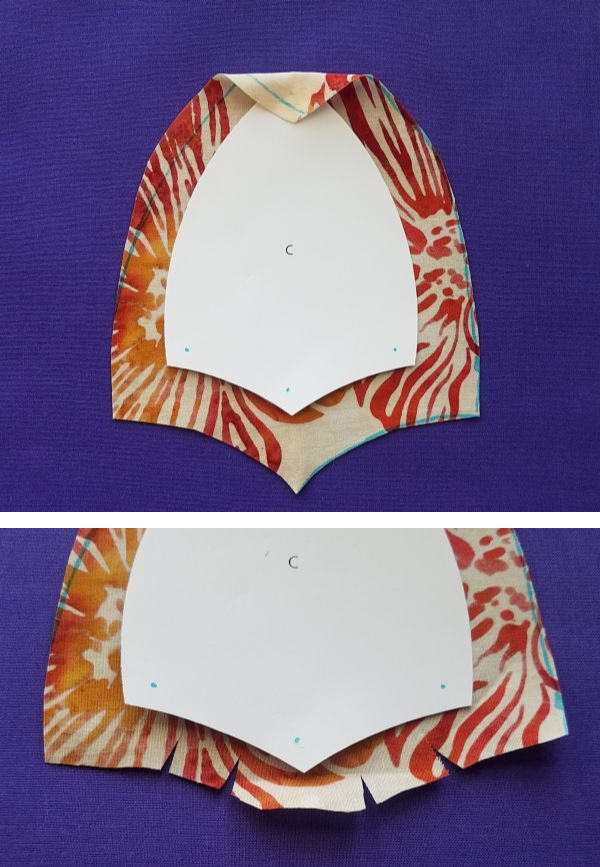
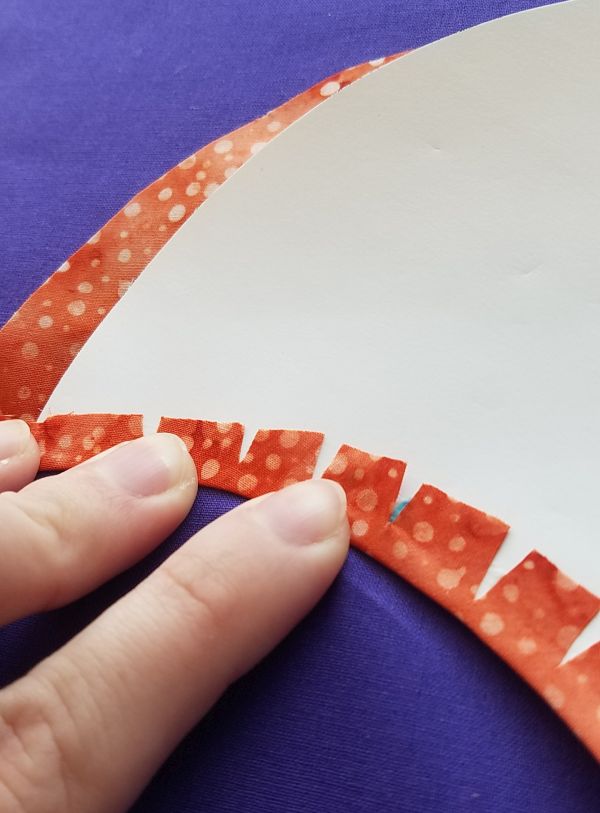
It can be easier to baste concave curves (innies) first. Clip the seam allowance in a few places, stopping about 1/8″ from the edge of the paper. Do not clip all the way to the paper.
Glue along one of the convex curves. Leave at least 1/8″ from each edge of the paper. Press the corners into the glue first, then press the rest of the seam into the glue. Allow to dry.
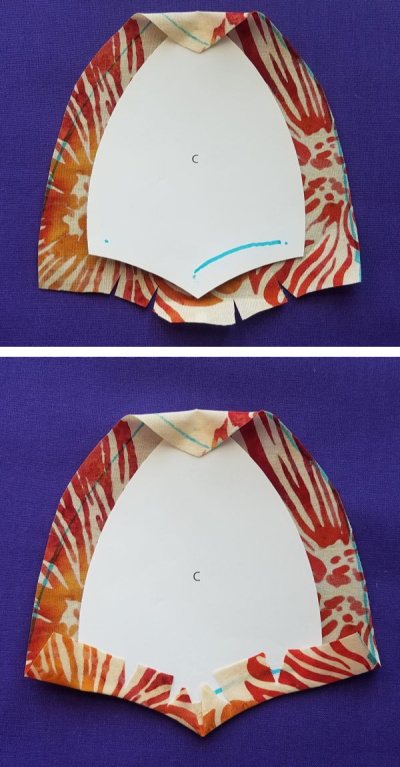
Repeat on the other concave curve.
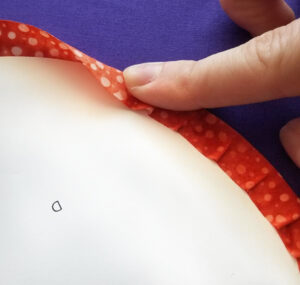
On the convex curve (outie), glue as before. Fold corners first, then drag the rest of the seam over the paper edge to press it into the glue. Some people like to start at one end and work to the other, some prefer to work from the middle. Experiment and find what works best for you in different situations.
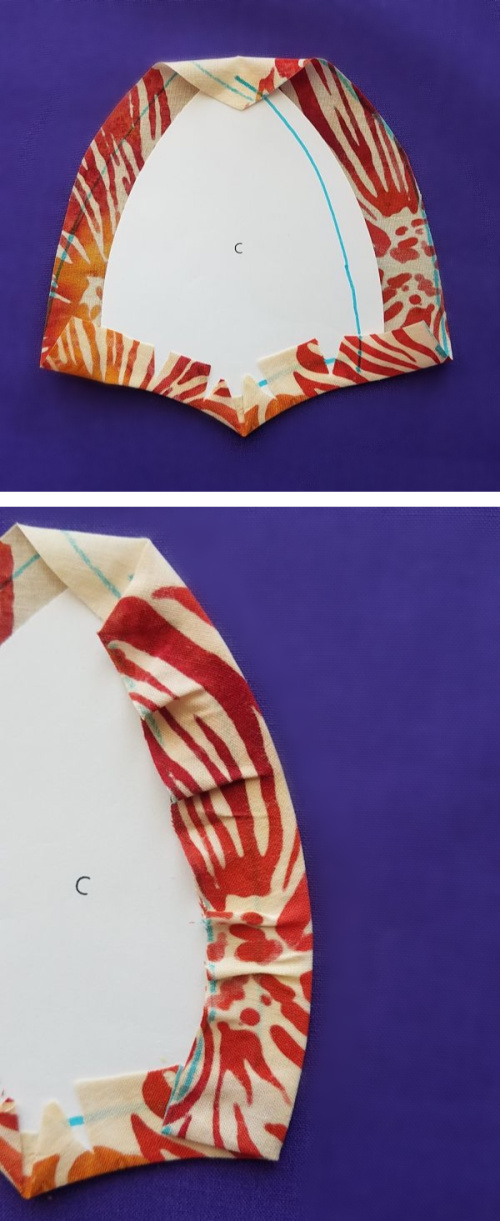
To ensure a smooth edge, don’t allow the fabric to crease at the edge of the paper. If a crease occurs there, lift to release, reapply glue and finger press again.
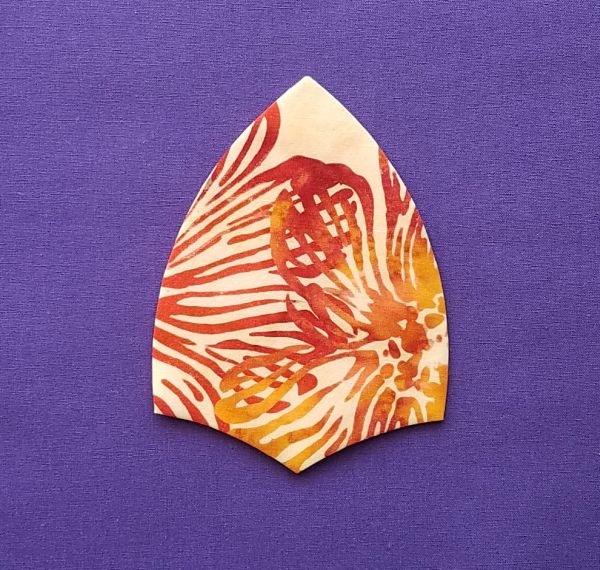
You can heat set with a quick press of a hot iron if you’d like.
Glue Basting Piece D
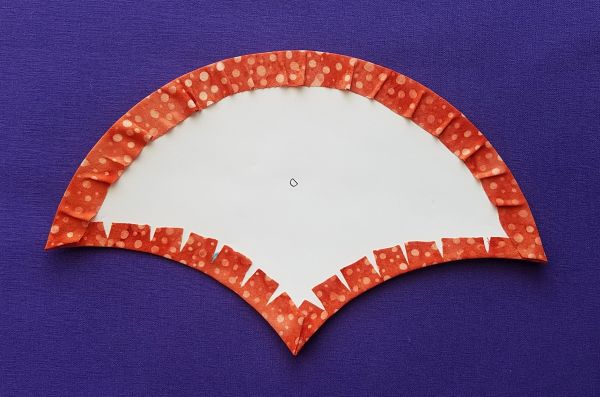
All the same steps apply to piece D, but because it’s larger, it can be necessary to work the curves in halves. The glue dries quickly and we want it as sticky as possible for curved EPP.
On concave curves, try using some fingers to hold already pressed sections while folding over the rest. This adds stability and speed to the gluing process.
On convex curves, feel the fabric under your index finger while dragging it over the edge of the paper. You’ll be able to feel when a crease starts too close to the edge of the paper. This helps you catch creases and correct them while the glue is still wet.
Manipulate the fabric until it smoothly covers the curves of the paper.
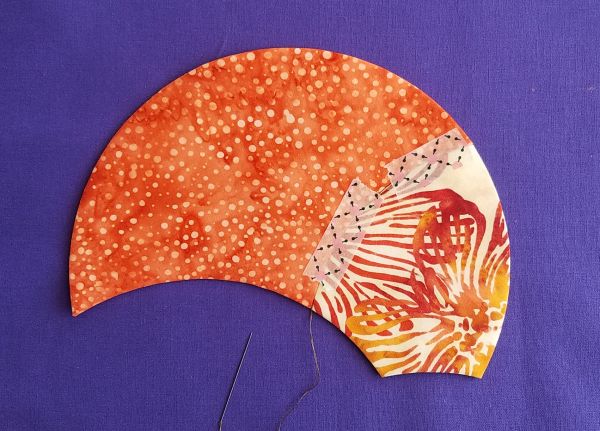
Sewing Curved Pieces

Lay the pieces so they line up. Start a length of thread and take a first stitch right at the corner to stabilize. Quilters have different ways of starting EPP pieces, so do what’s comfortable to you.
On a flat surface, turn the pieces over so the right side is facing up. The pieces should be butted right up to each other without gaps or overlaps.
Use a piece or two of masking tape or washi tape to secure the pieces together. (It’s safe to use masking tape and washi tape on our fabric projects for short periods of time, but don’t leave them on more than 24 hours.)
Turn back over to the back side. Work from a hard, flat surface, especially at the beginning, to keep the pieces from shifting out of position.
Flat Back Stitch
The Flat Back stitch gets its name from how it’s worked: two pieces laid flat and stitched from the backside.
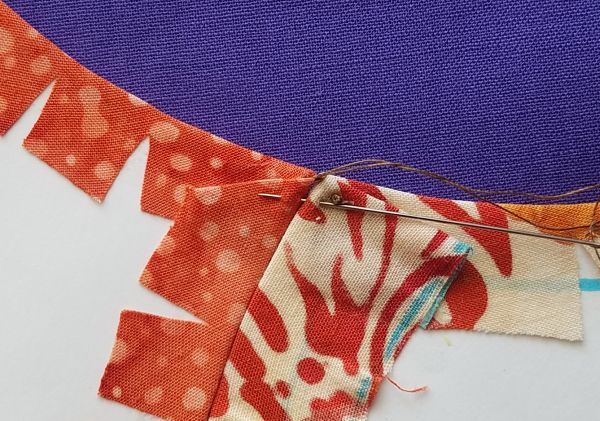
Put the needle in the fabric about 1/8″ or less from the edge of the paper and then back out at the edge of the paper. Bring the needle into the edge of the other piece, and then back out about 1/8″ from the edge. You’re working inside the pocket of fabric at the edge of the paper that isn’t glued down.
Pull the thread through.
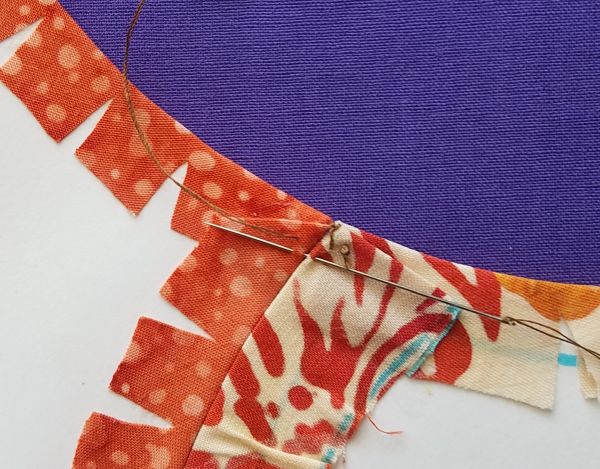
Take a stitch again. If you work from the side you came up in, there will be a visible stitch going down between stitches. If you start in the side the previous stitch started in, there will be a visible stitch crossing over the joined pieces. (I worked it the latter way because it feels most natural for me and I don’t mind my threads showing.)
Create tension between the stitches so there’s no gap or overlap between the pieces.
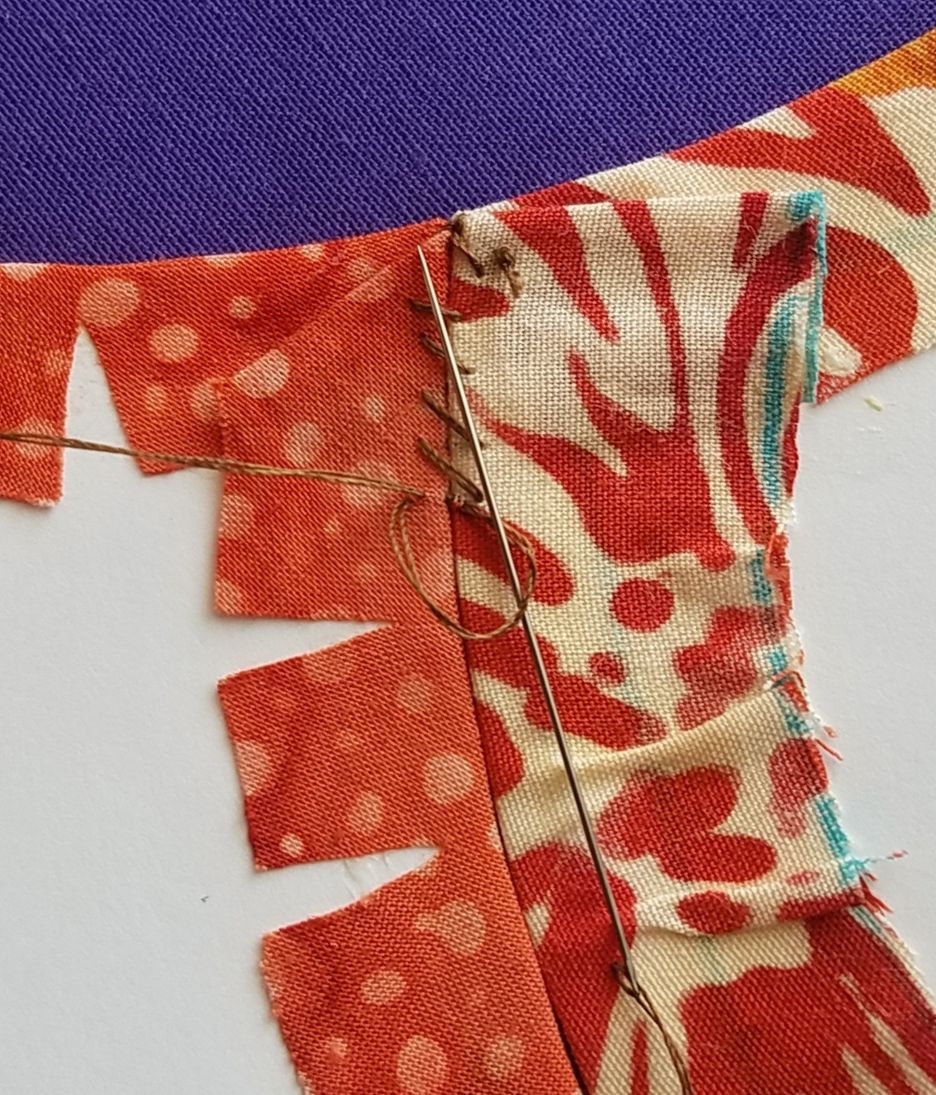
Every few stitches, take a tailor’s stitch that secures the seam by putting the needle back through the loop of a stitch as you pull the stitch through.

Take stitches as far apart as you prefer for English Paper Piecing. Secure the end using your preferred method. I like to take a couple overlapping tailor’s stitches.
Viewed from the front, the Flat Back Stitch is practically invisible. Curved English Paper Piecing is a fun way to achieve beautiful, complex curves with minimal effort.
Show off your progress, connect with other quilters, get ideas, motivation and more!
Join us in the AQS Project Parade Facebook Group and piece along with us!
Members get even more…
AQS Members can access hundreds of patterns and digital issues of American Quilter at any time!
Find quilt along series like Forever & A Day, 30 Days of Birds and more.

Not a member? Join today!
 eBook A Miniature World