 Please join us in welcoming Guest Blogger Lori Miller.
Through Lori’s website, Lori Miller Designs, she blogs about her adventures in sewing and creativity.
Here’s a detailed tutorial for her cute, quilted Mod Apple Hot Pad. She says “Making and giving handmade is love you can hold!”
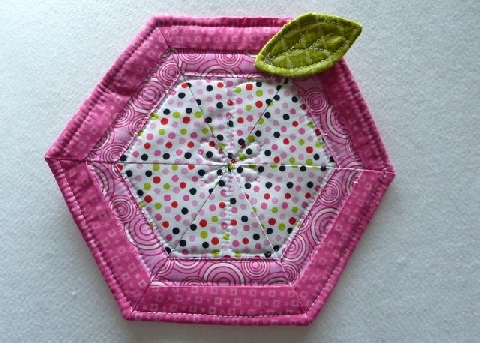
Here’s Lori:
I am spending the week at my cottage in northern Michigan and I was able to visit the local farmers market this week. I was thrilled to find my favorite early apple, Ginger Gold. They are a cross between an early apple and a yellow delicious: tender skin and tangy flavor. They were the only thing I could eat when I was pregnant many years ago with my son and I still love them. They are the inspiration for this fancy little apple hot pad. This one is a Pink Lady apple, but you could easily make a tasty Red Jonathan, yummy Yellow Delicious, or Green Granny Smith. Make your favorite apple to celebrate the arrival of fall.
Materials:
• 1 – 3 ¼” x 40” strip for apple center
• 1 – 1 ½” x 40” strip for outer apple skin
• 1 – 1 ¼” x 40” strip for inner apple skin
• 1 – 3” x 6” rectangle for leaf
• 1 – 12” x 12” square for back of apple hot pad
• 1 – 12” x 12” square of insulated batting (Note: A batting like Insul-Bright by The Warm Company reflects energy, hot or cold, back to itself. You can find it with utility fabrics.)
• 60 degree ruler or my triangle template
Directions
Cut:
1. Print out my FREE Mod Apple Hot Pad Templates.
2. Using the hexagon template, cut out the back of the hot pad.
3. Using the same hexagon template, cut out the insulated batting.

Sew:
4. Stitch the strips together, one at a time, ironing seams open. Make sure the narrow strip for the inner apple skin is in the center.
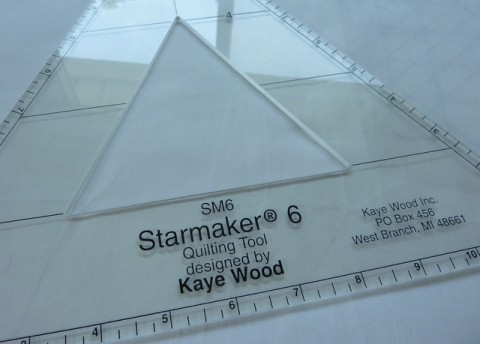
5. Using a 60 degree ruler, cut six equilateral triangles. If you have a 60 degree ruler, this goes pretty fast. I had an old Starmaker ® 6 ruler from a Kaye Wood class that I had attended. Several companies make them, but if you don’t have one, just use my template, a regular rotary cutter and straight rotary cutting ruler.

6. Position the ruler to start cutting with the outside apple skin on the bottom.
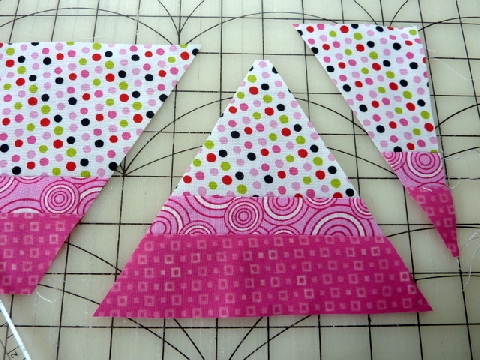
7. Cut out a triangle.
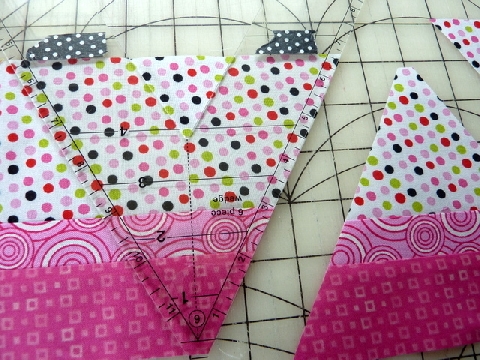
8. Flip the ruler and cut another triangle from the top, Lay these aside and save them for another project or make them into another hot pad.
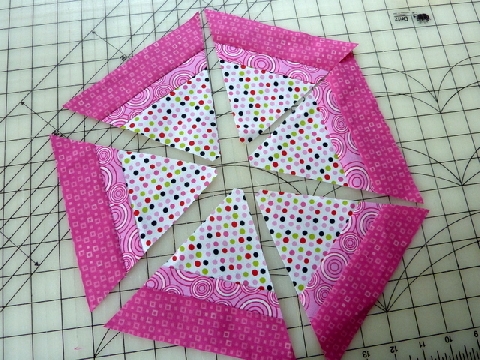
Cut six triangles total. There should be enough fabric to cut six apple triangles and six other triangles. Stitch your triangles together. Be sure to line up the seams on each side so they match.
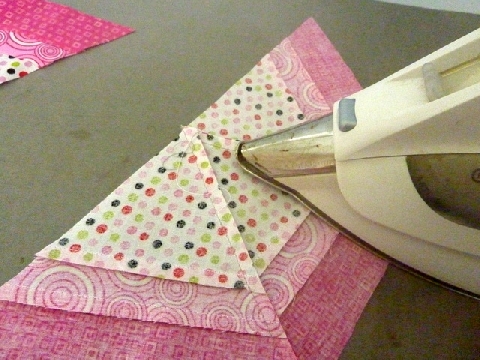
9. Piece them in groups of three and press seams open.
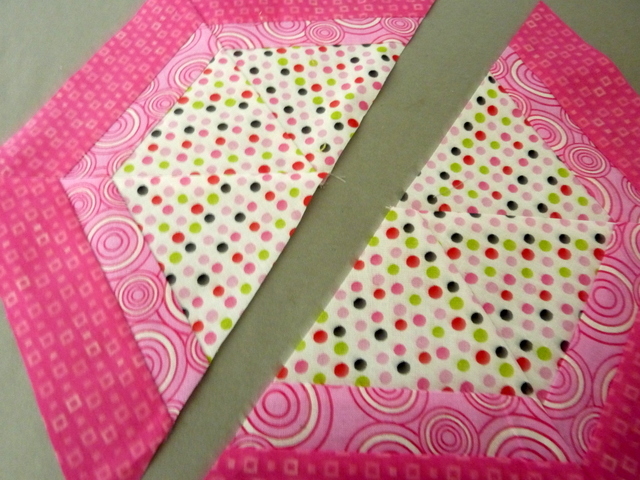
10. Stitch the two halves of the apple together, aligning the seams, and iron flat.
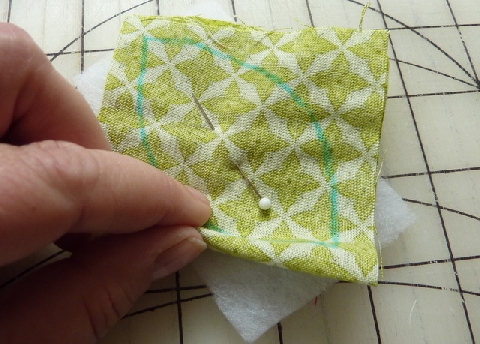
11. Fold the leaf fabric right sides together and mark the leaf.

12. Layer a small piece of batting underneath and stitch around the leaf leaving a place to turn. Snip curves and turn right side out. Whip stitch the opening closed.
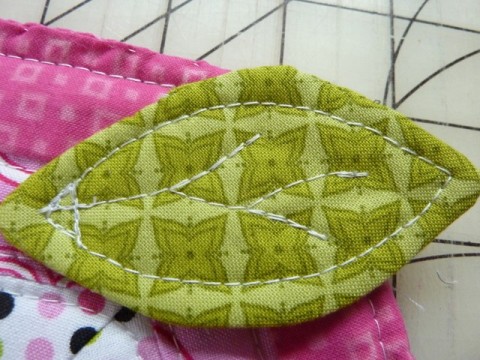
13. Quilt the leaf.
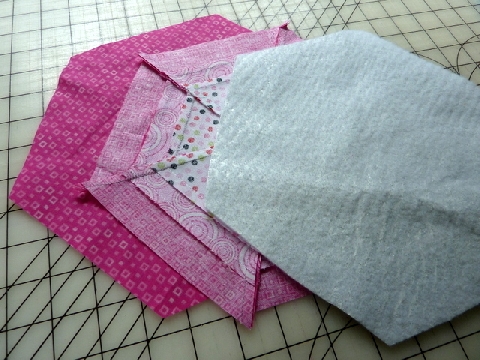
14. Make a quilt sandwich. Lay the backing right side up, the pieced apple right side down and the insulated batting on the top. Pin and stitch all around, leaving an opening to turn. Turn the apple right side out and whipstitch the opening closed.
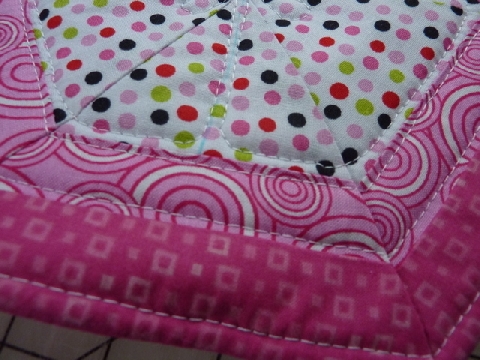
15. Quilt the apple. I just used straight line quilting with my walking foot.

16. Here is a close up of my quilting from the back. I made the center of the apple with a couple of seeds.
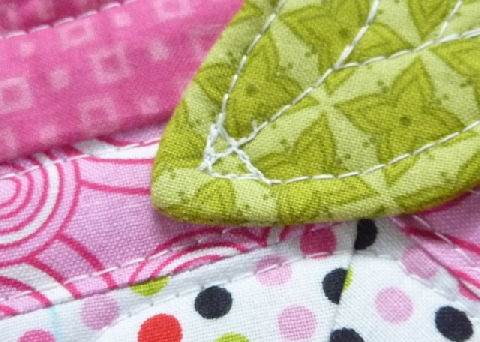
17. Tack on the leaf. I just stitched a small triangle at the base.
That is it, a bright, cheery apple to decorate your table and a practical hot pad to boot. What is your favorite apple?
Lori Miller
Find Lori at lorimillerdesigns.com, on Instagram @lorimillerdesigns,