
Get in the spirit with the Joy Pillow!
25″ x 15″
by Emily Cross
Fabric Requirements:
White — 1/2 yard
Red — 1/8 yard
Green — 1/4 yard
Backing — 1/2 yard
J Block
Cutting Instructions:
From the white fabric, cut:
(1) 2″ x 5″ rectangle
(1) 3 1/2″ x 6 1/2″ rectangle
From the red fabric, cut:
(2) 2 1/2″ x 2 1/2″ squares
From the green fabric, cut:
(4) 2 1/2″ x 2 1/2″ squares
(1) 2″ x 6 1/2″ rectangle
(1) 2″ x 3 1/2″ rectangle
(1) 2″ x 2″ square
Assembly:
Mark the wrong side of 4 green 2 1/2″ squares in half diagonally once. Lay a green square over a white 2 1/2″ square, right sides together. Sew a quarter inch from each side of the marked line. Cut apart on the marked line and press towards the green. Trim Half Square Triangle (HST) to 2″ square. Make:
- (3) Green/White HSTs
- (3) Green/Red HSTs

Sew 3 Green/Red HST together as shown, press towards the red.

Sew the white 3 1/2″ x 6 1/2″ rectangle to the left side of the green 2″ x 6 1/2″ rectangle, press to the green. Sew to the bottom to the unit from the previous step.

Sew the green 2″ x 3 1/2″ rectangle to the left side of a Green/White HST as shown, press to the green.

Sew to the previous unit to bottom of the unit from the previous step to make the Right Side unit.

Sew a green HST to each side of the green 2″ square as shown, press to the center. Sew the white 2″ x 5″ rectangle to the right side of an HST as shown, press to the white triangle.

Sew the previous unit to the left side of the Right Side unit to complete the J block. Measures 6 1/2″ x 9 1/2″ unfinished.
O Block
Cutting Instructions:
From the white fabric, cut:
(4) 2 1/2″ x 2 1/2″ squares
(2) 2″ x 3 1/2″ rectangles
From the red fabric, cut:
(2) 2 1/2″ x 2 1/2″ squares
From the green fabric, cut:
(2) 2 1/2″ x 2 1/2″ squares
(4) 2″ x 2″ squares
(2) 2″ x 6 1/2″ rectangle
(2) 2″ x 3 1/2″ rectangle
Assembly:
Mark the wrong side of 2 green 2 1/2″ squares in half diagonally once. Lay a marked green square over a white 2 1/2″ square, right sides together. Sew a quarter inch from the marked line on both sides. Cut apart on the marked line and press towards the green. Trim Half Square Triangle (HST) to 2″ square. Make:
- (4) Green/White HSTs
- (4) Red/White HSTs

Sew a Green/White HST to each side of a green 2″ x 3 1/2″ rectangle, press towards the half square triangles. Make 2 for the Top and Bottom unit.

Mark the wrong side of 4 green 2″ x 2″ squares in half diagonally once. Lay a marked green square over a white 2″ x 3 1/2″ rectangle so the high point of the marked line points to the center. Sew on the marked line. Trim a quarter inch from the sewn line and press to the green. Make 2 Flying Geese units measuring 2” x 3 1/2″ unfinished size.
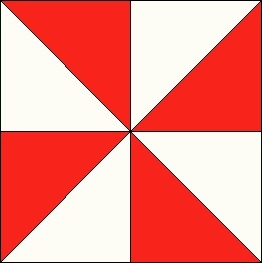
Sew Red/White HSTs into pairs, and press towards the red. Sew the pairs into a Pinwheel as shown, and press in one direction.
Sew a Flying Geese unit to the top and the bottom of the Pinwheel Unit. Sew a green 2″ x 6 1/2″ rectangle to the left and the right side of the previous unit.
Sew a Top unit to the top and a Bottom unit to the bottom to complete the O block. Measures 6 1/2″ x 9 1/2″ unfinished.
Y Block
Cutting instructions:
From the white fabric, cut:
(1) 2 1/2″ x 2 1/2″ square
(1) 2″ x 3 1/2″ rectangle
(1) 1 3/4″ x 1 3/4″ square
(3) 1 1/4″ x 2″ rectangles
(2) 1 1/4″ x 1 1/4″ squares
(2) 2 3/4″ x 4 1/4″ rectangles
(2) 2″ x 2 3/4″ rectangles
From the red fabric, cut:
(8) 1 1/4″ x 1 1/4″ squares
From the green fabric, cut:
(1) 2 1/2″ x 2 1/2″ square
(3) 2″ x 2″ squares
(1) 1 3/4″ x 1 3/4″ square
(2) 1 1/4″ x 1 1/4″ squares
(1) 2″ x 4 1/2″ rectangle
(1) 1 1/4″ x 2″ rectangle
Assembly:

Sew a green 2″ square to each side of a white 2″ x 3 1/2″ rectangle, press to the green.
Mark the wrong side of 8 red 1 1/4″ x 1 1/4″ squares in half diagonally once. Lay a marked red square over a white 1 1/4″ x 2″ rectangle so the high point of the marked line points to the center. Sew on the marked line. Trim a quarter inch from the sewn line and press to the red. Repeat on the other side with another marked red square. Make 3 red/white, and 1 red/green Flying Geese units.
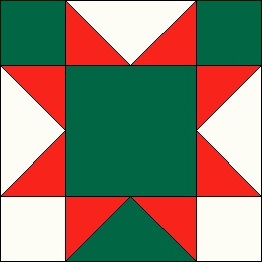
Using the Flying Geese, 2 green 1 1/4″ squares, 1 green 2″ square, and 2 white 1 1/4″ squares, lay out the block as shown above. Sew the top row and press to the squares, sew the middle row and press to the center, sew the bottom row and press to the squares. Sew the rows together and press to the center to make the Sawtooth Star unit.
Mark the wrong side of 1 white 2 1/2″ square in half diagonally once. Lay a marked white square over a green 2 1/2″ square, right sides together. Sew a quarter inch from the marked line on both sides. Cut apart on the marked line and press towards the green. Trim Half Square Triangle (HST) to 2″ square. Repeat this process with a white and a green 1 3/4″ square, trim to 1 1/4″ square.
Sew the green/white 1 1/4″ HSTs to each side of a white 1 1/4″ x 2″ rectangle, and press to the white rectangle. Sew to the top of the Sawtooth Star Unit.
Sew a green/white 2″ HST to the top of a white 2″ x 2 3/4″ rectangle, make 2. Sew to the left and right side of the previous unit as shown above, and press to the HST.

Sew a white 2 3/4″ x 4 1/4″ rectangle to each side of a green 2″ x 4 1/4″ rectangle, press to the green.

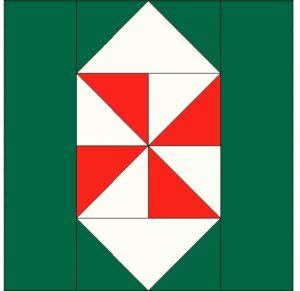
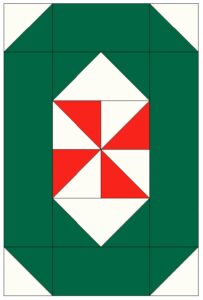
Lay out the units and sew together as shown to make the Y block. Measured 6 1/2″ x 9 1/2″ unfinished.
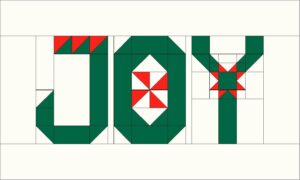
Joy Pillow
Cutting Instructions:
From the white fabric, cut:
(2) 1″ x 9 1/2″ rectangles
(2) 3 1/2″ x 9 1/2″ rectangles
(2) 3 1/2″ x 25 1/2″ rectangles
From the backing fabric, cut:
(1) 25 1/2″ x 15 1/2″ rectangle
Assembly:
Sew a white 1″ x 9 1/2″ rectangle between the block letters, 19 1/2″ x 9 1/2″ unfinished.
Sew a white 3 1/2″ x 9 1/2″ rectangle to the left side of the J block and the other white rectangle to the right side of the Y block, press to the white rectangles. 25 1/2″ x 9 1/2″ unfinished.
Sew a white 3 1/2″ x 25 1/2″ rectangle to the top and the bottom of the previous unit to make the Joy Pillow Front. 25 1/2″ x 15 1/2″ unfinished.
Optional: Quilt the Joy Pillow Front as desired.
Lay the Joy Pillow Front and the backing 25 1/2″ x 15 1/2″ rectangle right sides together. Sew a quarter inch around the outer edges, leaving a 3-4” opening in the bottom.
Turn right sides out and stuff Joy Pillow. Ladder stitch the opening in the bottom closed.